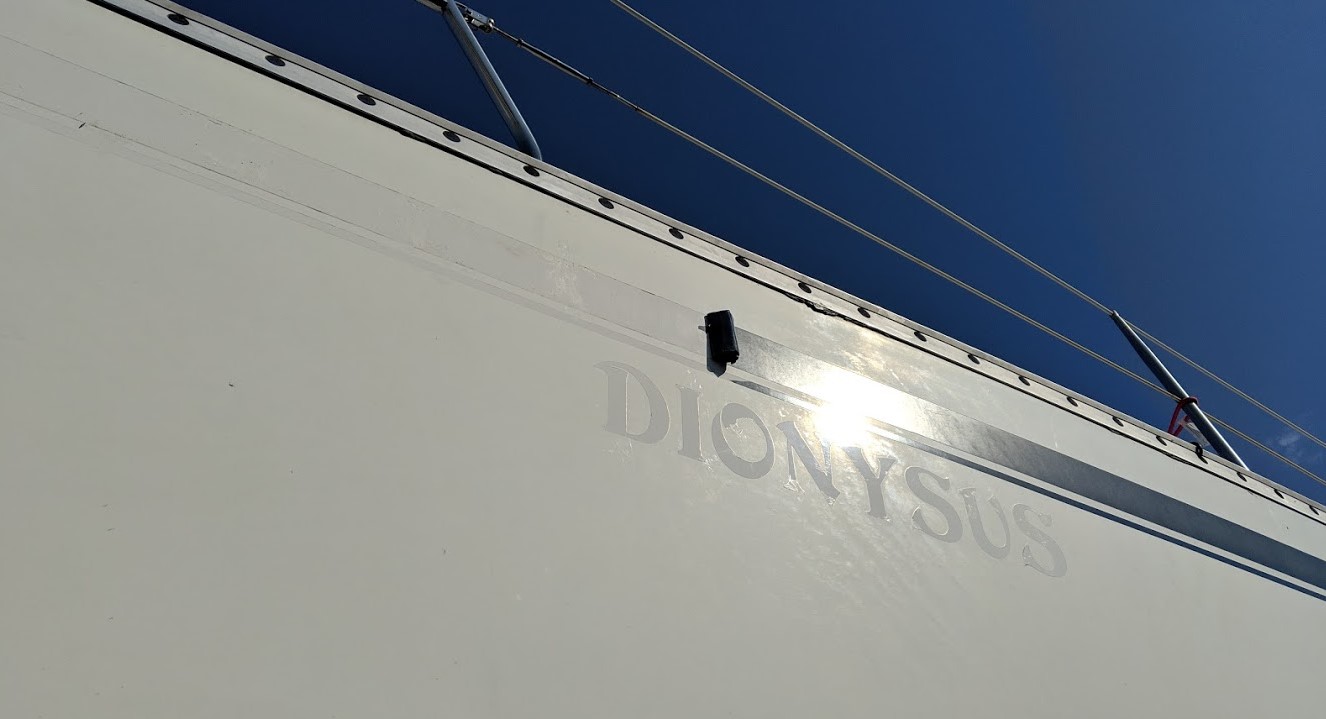
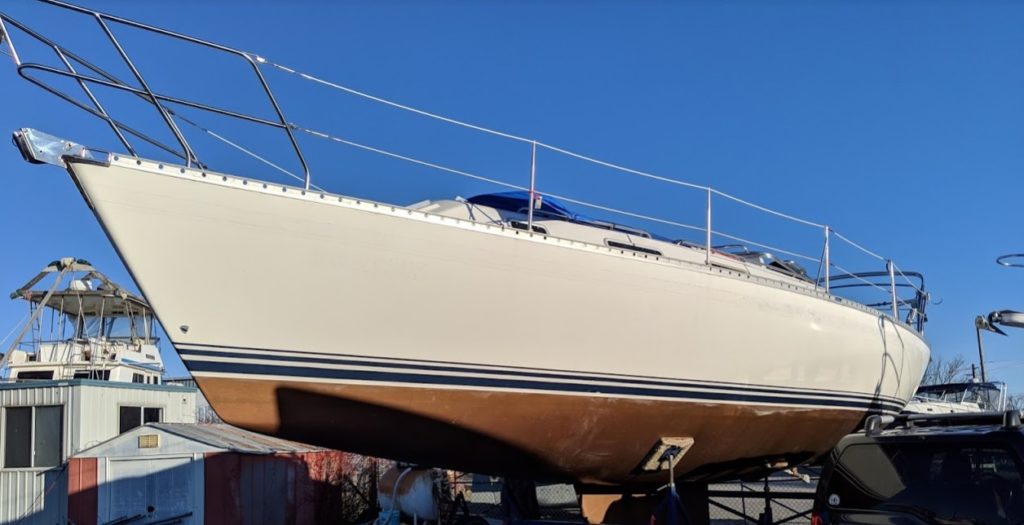
Our vinyl striping was looking a bit rough and we now have a new name for our sailboat that we wanted to apply. After a bit of research we found a few options and watched several YouTube videos showing us how easy it is. It’s all a lie. I never want to do this again.
Heat and peel
This was the preferred method mentioned by most. And it does work well, provided you have the following conditions:
- Warm’ish weather with no wind
- The vinyl is not cracked
- The vinyl is in decent shape, thick lines are much more difficult than thin lines

We found a heat gun (lowest setting) with an ice scraper worked the best. One of us pre-heated the vinyl and used our hands on the vinyl to ensure we didn’t overheat it. The thin line came off within minutes and we were taking it off in 3-4 foot segments.

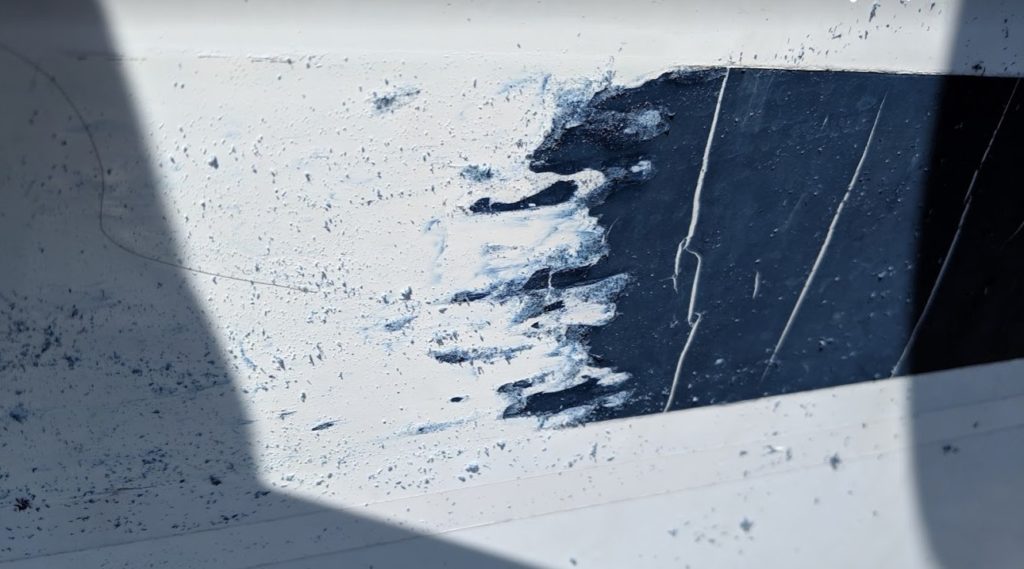
The 3″ vinyl stripe wasn’t as easy. It would stretch and tear and each crack shown above meant it would only come off in little chunks and was very, very, frustrating. We also had some nasty gusty wind that made it near impossible to heat the vinyl to the right temperature. No wind and it would overheat and then with wind it was hard to warm it at all.
The 3M Stripe Off Wheel
We found some suggestions online that the 3M (Scotch-Brite) Stripe Off Wheel was the magic tool for vinyl removal. It wasn’t cheap, best we could find was almost $50 on Amazon. But I’m glad we decided to buy it.
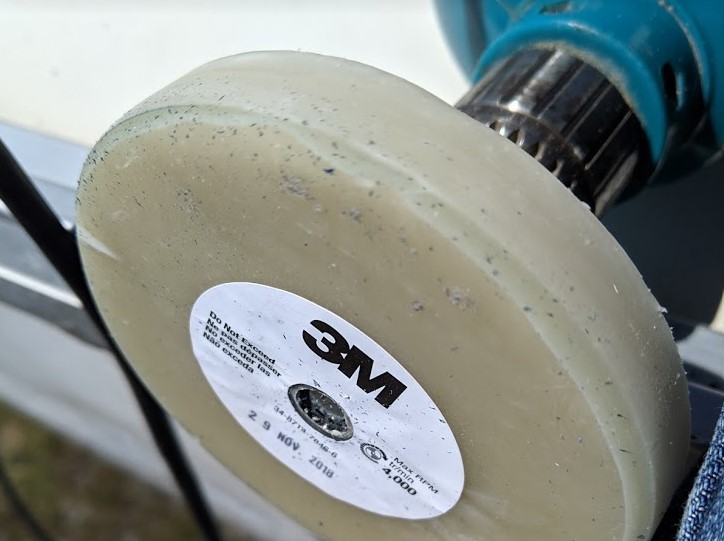
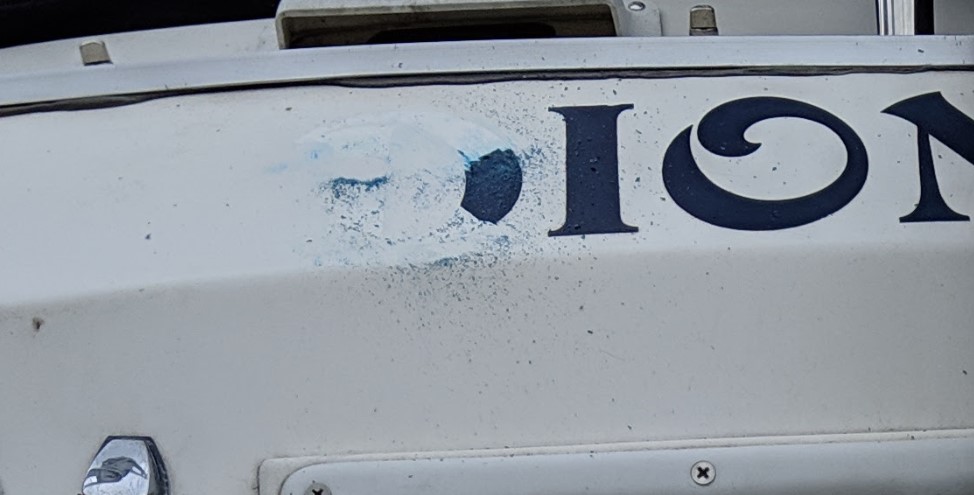
We originally started with this wheel and it was not that successful. It left blue smears and some brown burn like marks on the fiberglass. Later we figured out that good vinyl like this is much easier to take off with the heat and peel method.
Eventually, we got better and it was the preferred tool for removing the rough cracked vinyl that couldn’t be peeled off easily.
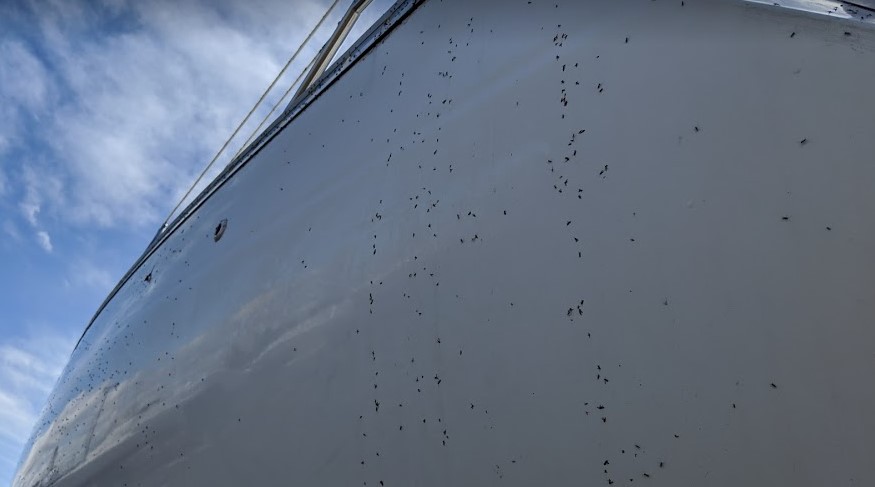
It removed the vinyl and did a great job removing the sticky mess as well. More consistent than our heat and peel, we had some sections where we peeled the vinyl off but left behind a sticky layer. The picture above looks bad but that’s just vinyl bits (and a hair) that easily brushed off.
And here’s what a naked hull on a CS34 looks like.
It didn’t stay clean for long, you gotta love the swarms of little bugs that seemed to like the morning dew on the boat.
Buying the new vinyl and lettering
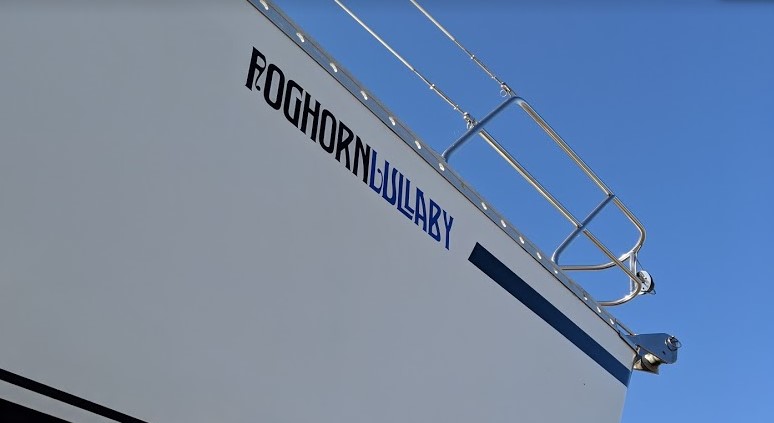
We had a custom logo and lettering created for us using an online service called Fiverr. We paid $150 for a designer to come up with some sample logos and typefaces, we selected one and then spent a bit of time fine tuning with several e-mails back and forth with the designer. The end result was several vector graphic files e-mailed to us.
We passed these files on to a friend that does vinyl cut lettering and vinyl wraps for cars, along with a bit of cash and some beer.
The vinyl stripe came from Holland Marine. We decided to simplify the look using a single 3″ vinyl stripe and not replicate the original double stripe. Peter at Holland Marine quoted us $220 for the original double stripe and a single stripe was $134 for 75′ of 3″ in “Avery Solid Dark Navy” colour. This matched our other stripes exactly. We also purchased two CS34 white logos, $40 each, for both sides near the stern. The boot striping (triple blue strips at base) were in decent shape, we kept the originals on.
Applying the vinyl
After giving the hull a thorough cleaning:
- Buffing compound (no wax)
- Clean water wash
- Acetone
- Clean water wash
- Dry (and brush off accumulating bugs)
We started with the lettering. Using a tape measure and a pencil we marked out on the hull where it should go and then carefully applied it. It went smoother than I thought and we almost did it bubble free.
We then started applying the vinyl striping. Again using a tape measure and a pencil to mark spots along the line we wanted to make. We could also faintly see the old line to help guide us. This involved a technique of starting, and lightly tapping the vinyl several feet up, going back to beginning with a thick card and pressing it on. It also involved 4″ forward, 1″ back to fix any mistakes or bubbles. We finished one side of the boat late into the night with our headlamps.
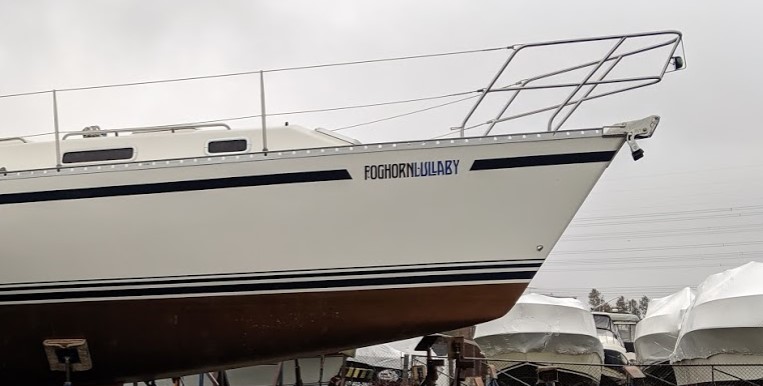
My favourite part was completing the stripe at the stern of the boat and then going back with the white CS34 logos. I think it looks just like new!
We then finished up with the name and the logo on the stern of the boat.
I hated the process for removing the vinyl. It took us two full days to do this and I honestly never want to do this again. But, now that I look at the final results I’m very happy we did this. Maybe in time I’ll forget how much I hated this project and will do it again.
Lessons Learned
- 3M wheel useful for small sections with lots of cracks in vinyl
- Heat and peel works well for newer vinyl
- Heat gun worked better than hair dryer but needed to careful to not cook the vinyl off
- Sunny side of boat worked better than shady side
- It takes a long long time to do this. Budget a few full days if vinyl is old and cracked
- Acetone removes the left over glue residue. We were warned that Goo Gone may mess up the gel coat.
- The old name will continue to be visible in certain light no matter how much you buff it. I’m guessing it will quickly fade in time.


Leave a Reply