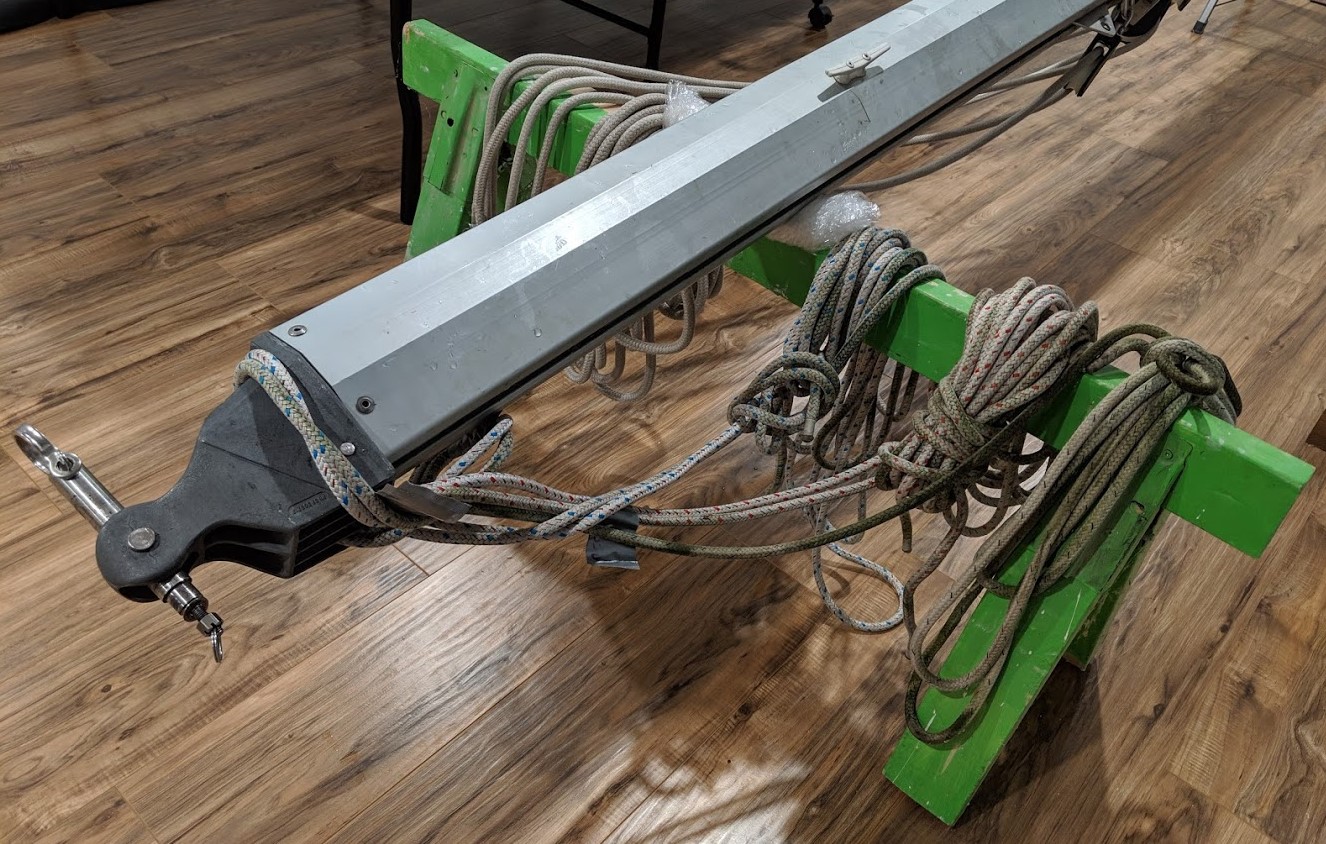
I’ve been waiting for a while to figure out what’s going on inside of our boom. We had difficulties last season with the reefing lines getting stuck when raising our main. We would have to pull the reefing lines out of the rear of the boom as we raised the main. We suspected it was mostly due to crud collecting in the boom, there were birds nesting in there before we purchased. We found a few surprises.
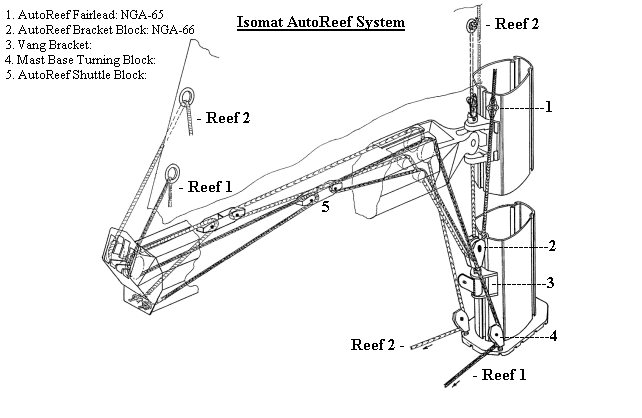
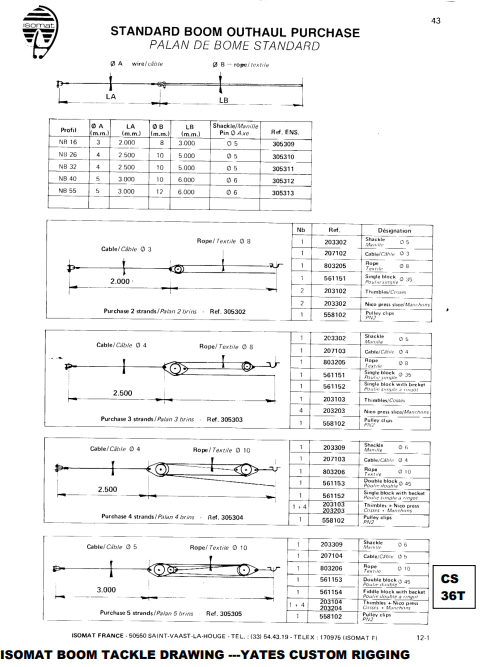
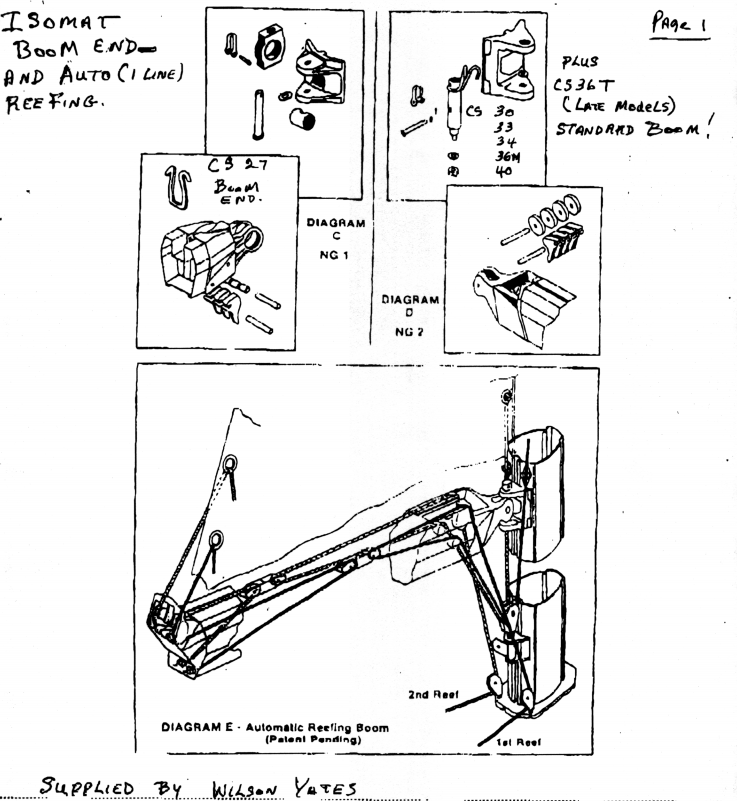
The following diagram showed us what to expect. We didn’t notice earlier that it’s missing the outhaul. Also found our boom has four pulleys but is only using three. I guess it could support a Reef 3.
First step was to figure out how to get the rivets out of the boom. We also decided only to remove one end of the boom. We removed the non-gooseneck side (rear) since we really needed to retrieve the outhaul cable so we can replace the lines.
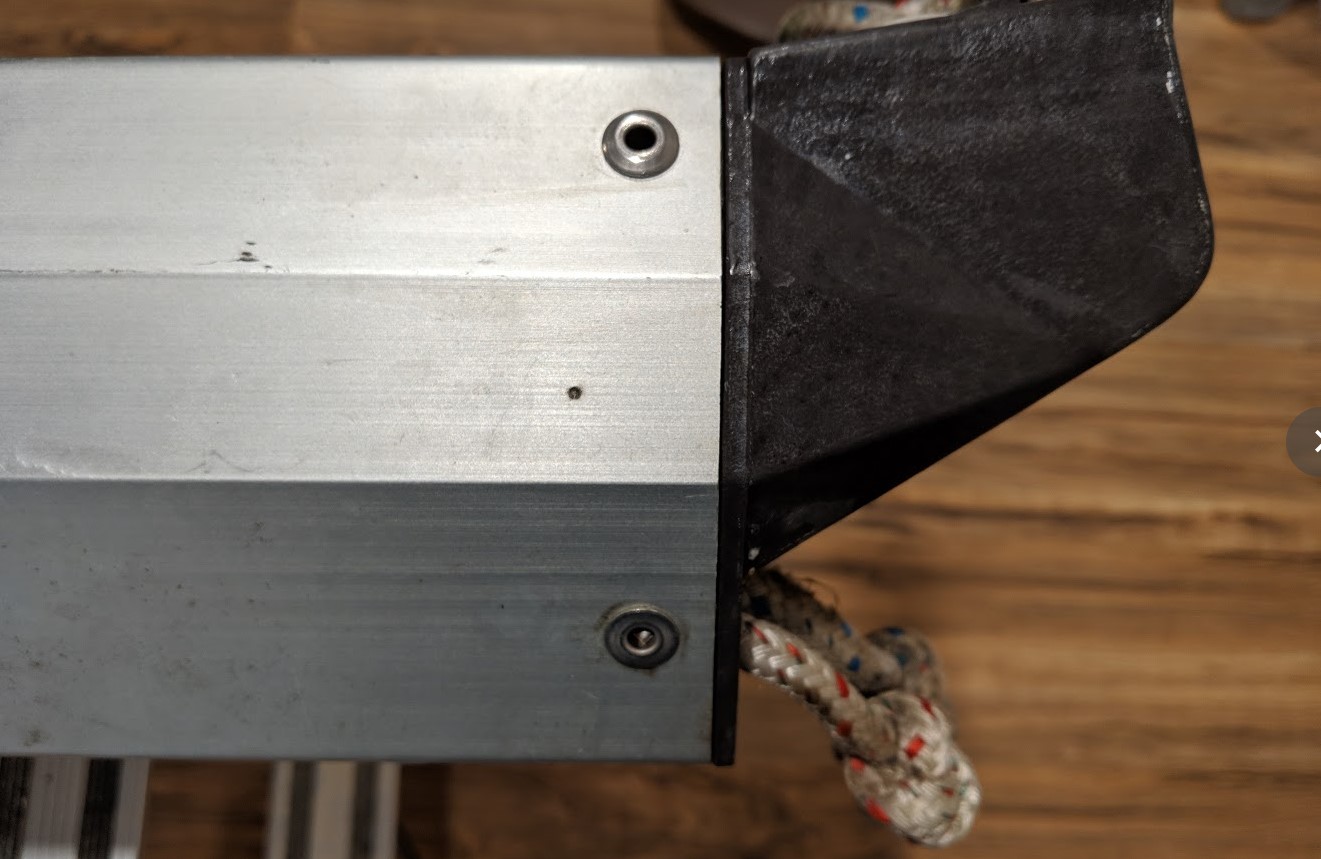
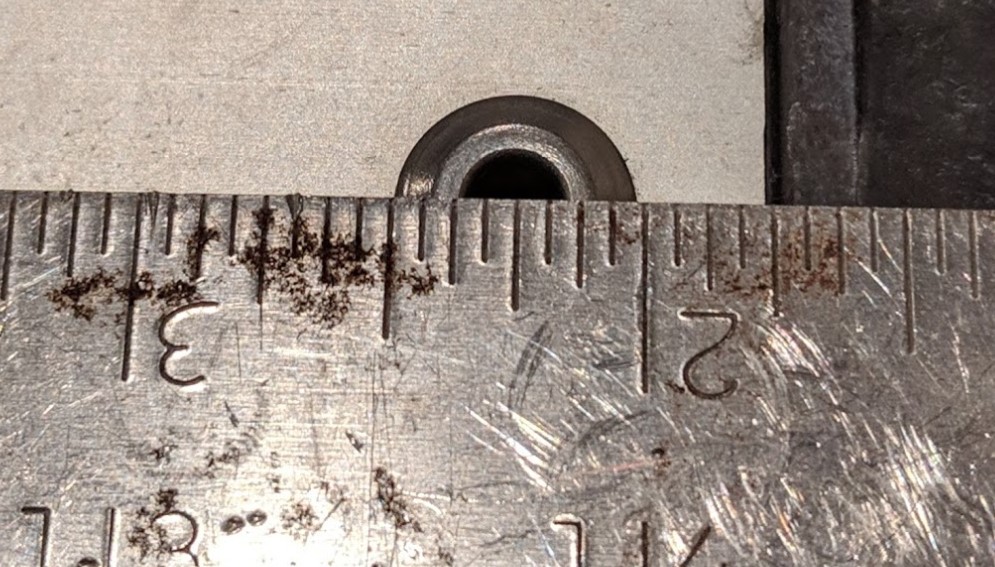
The rivets are 1/2″ outer diameter and almost 1/4″ inner diameter. We were given the advice to not try and drill from the inside out. Start with a drill bit that is bigger than 1/4″ and smaller than 1/2″.
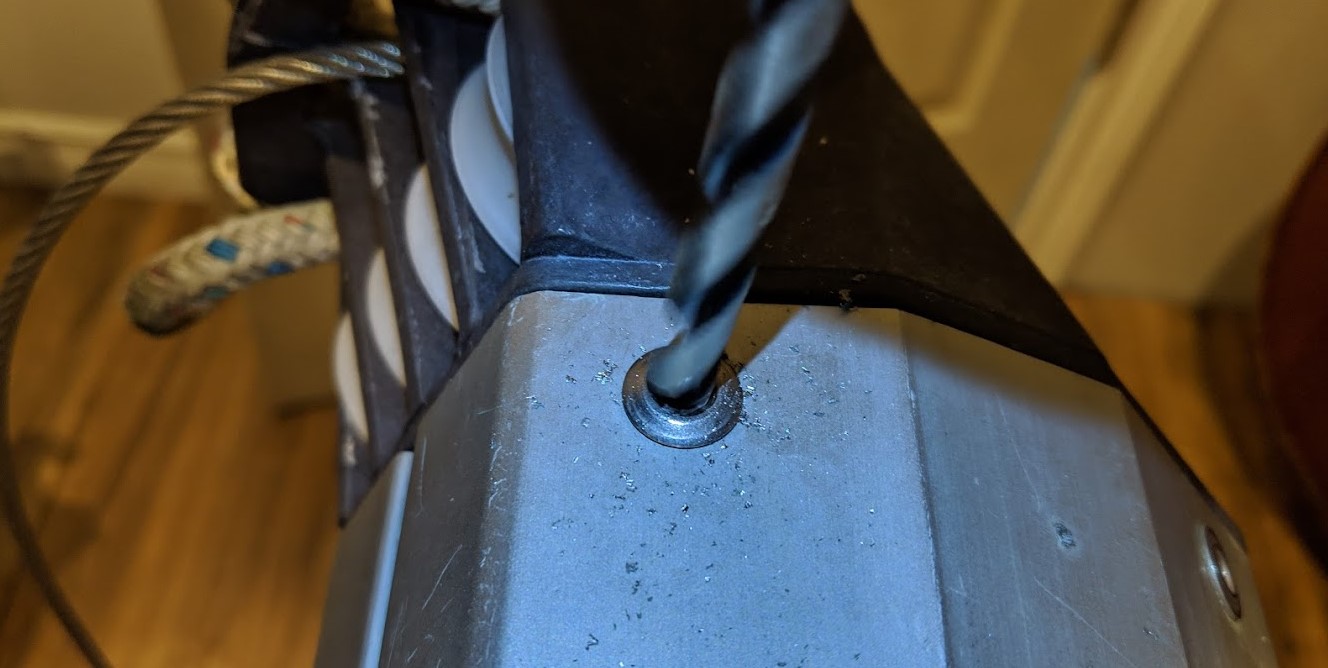
Using a metal drill bit, Lori took on the brave job of drilling off the rivet head. We were nervous. The rivet steel is harder than the aluminum, and we didn’t want to damage the boom. This method worked really well. The moment the head of the rivet started to spin off we knew we were deep enough. After the head was off and the rivet was ground flush with the boom we were able to take a nail head and push the rivet through. Sounds pretty easy, if you do it right. We didn’t. See lessons learned below.
After all five rivets were removed the cast end cap with the pulleys (I’m sure there’s a proper name for this) easily slid off.
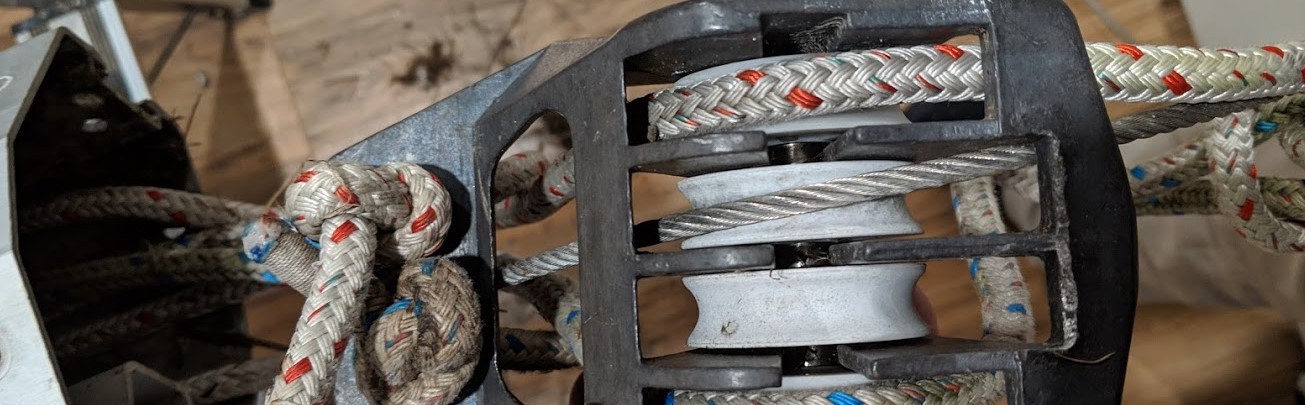
We documented and then undid all of the lines to pull the end cap right off. It’s in decent shape at first we didn’t know how to remove the pullies. But a member, John, from the CSOA forum provided the following advice.
“If you look at the photo of the fitting at the end of the boom, you will see the axel that the sheaves (pullies) rotate on, and that you can see it for its full length. This entire assembly, axel and sheaves, is only friction fit in the fitting, and held in place by the tension on the outhaul and reefing lines. If you loosen the tension on these lines, then get a screw driver, (or anything like that), you can pry the whole assembly out. If it is stuck, try a little silicone spay and some light taps with a hammer. You can also remove the sheaves in the same manner at the gooseneck end as well.”
Thank you John!
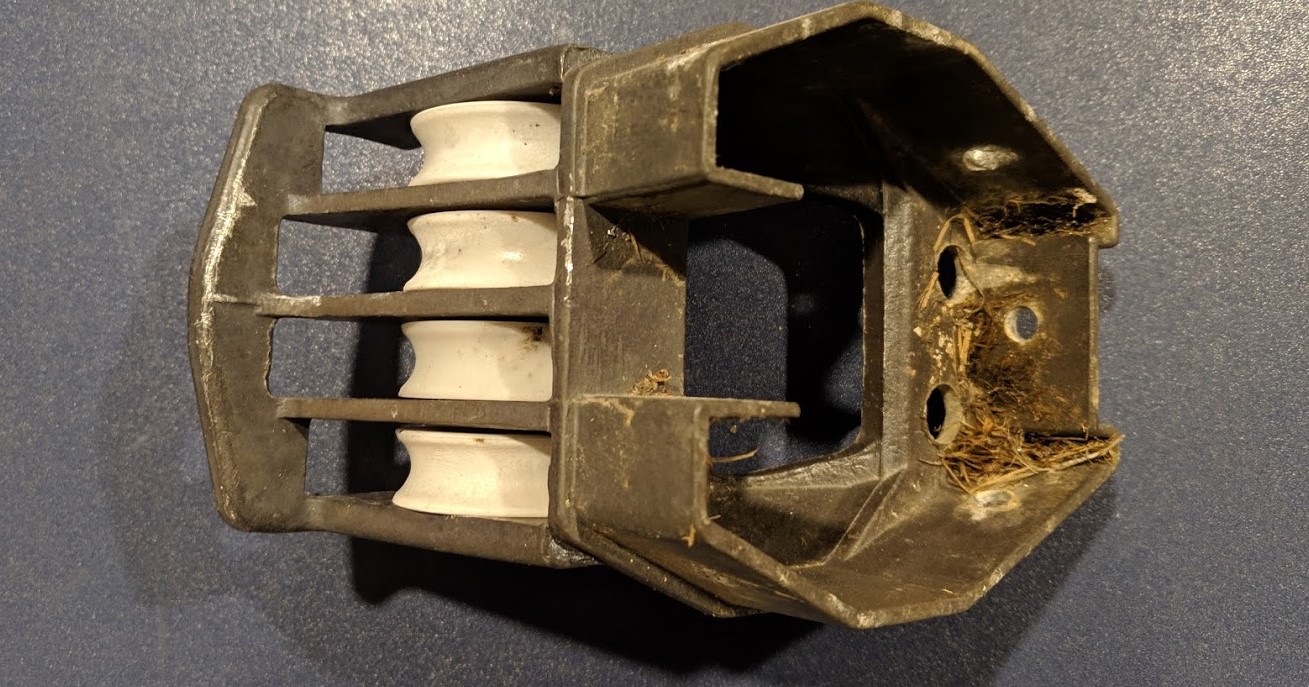
Inside the mast, we found a few surprises. First of all we could see the mess left behind by the birds. Not really a huge surprise.
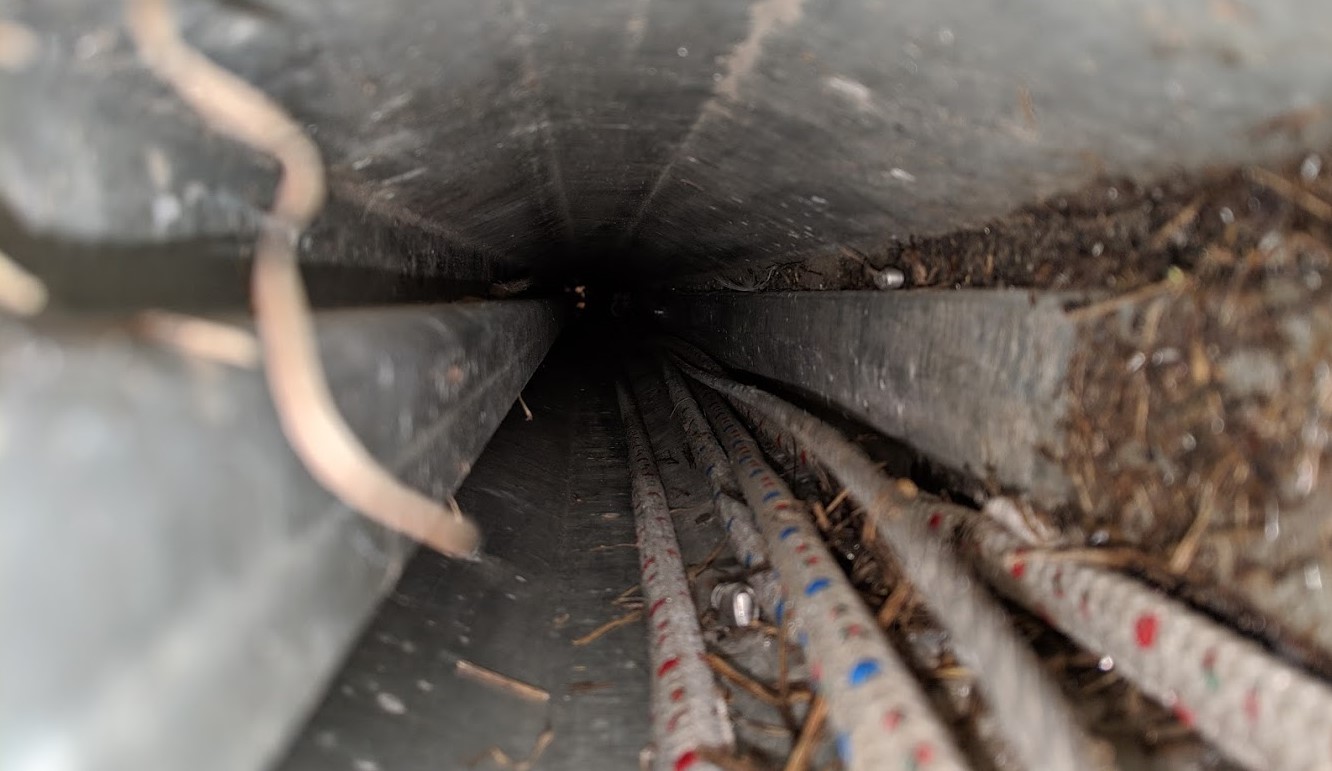
Second surprise was the assumption that the shuttle cars were gliding along some track. They just slide loose inside the boom.
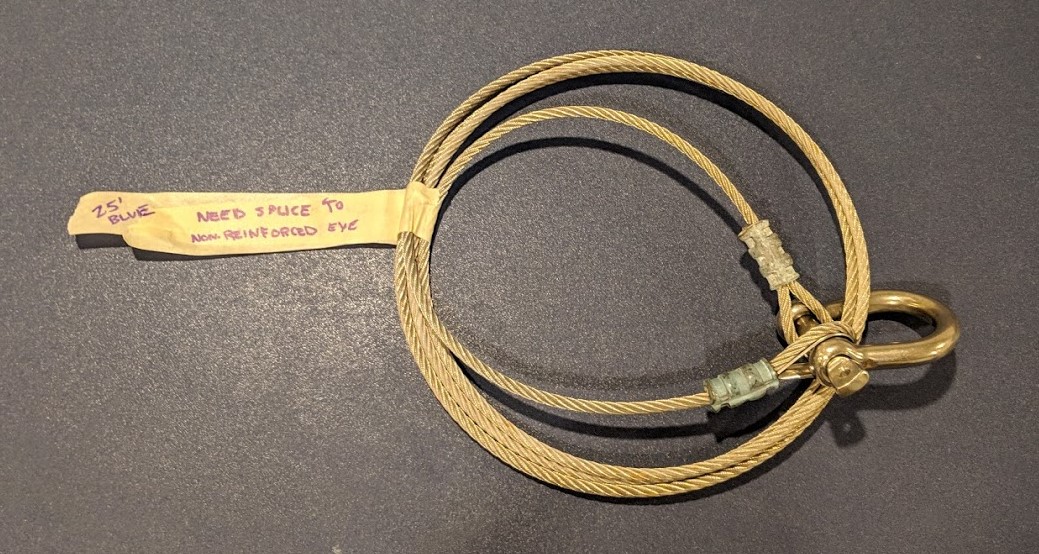
Third suprise was the outhaul. I was expecting it to go through a pulley to give a little mechanical advantage but it was directly attached with a bowline with some whipping and tape. If anyone knows why there’s 8 feet of cable used for outhaul rather than just running the line right to the sail, I’m curious to hear. I’m guessing it reduces stretch? Maybe we should use a higher tech line, i.e. Dyneema, right to the sail. If we are going to continue using the cable then I would prefer a less bulky splice.
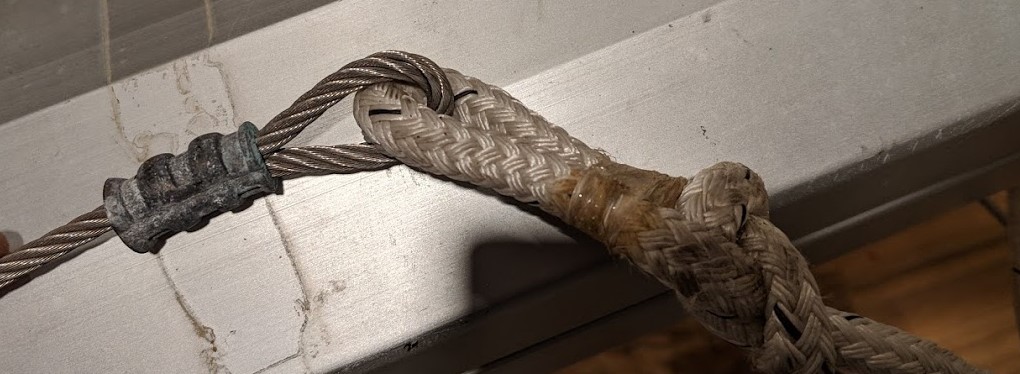
The outhaul wire has two eyes, one has an additional piece of reinforcement. This is used for the pin bow shackle that attaches to the sail.
John from the CSOA forum helped me out again, he replied with the following document. The boom in his CS30 is setup like the third from the bottom with two blocks. Looks like I may need to re-open my boom up.
The fourth surprise. It looks like someone made their own upgrade to the reefing system. One of the shuttles were replaced by two blocks taped together.
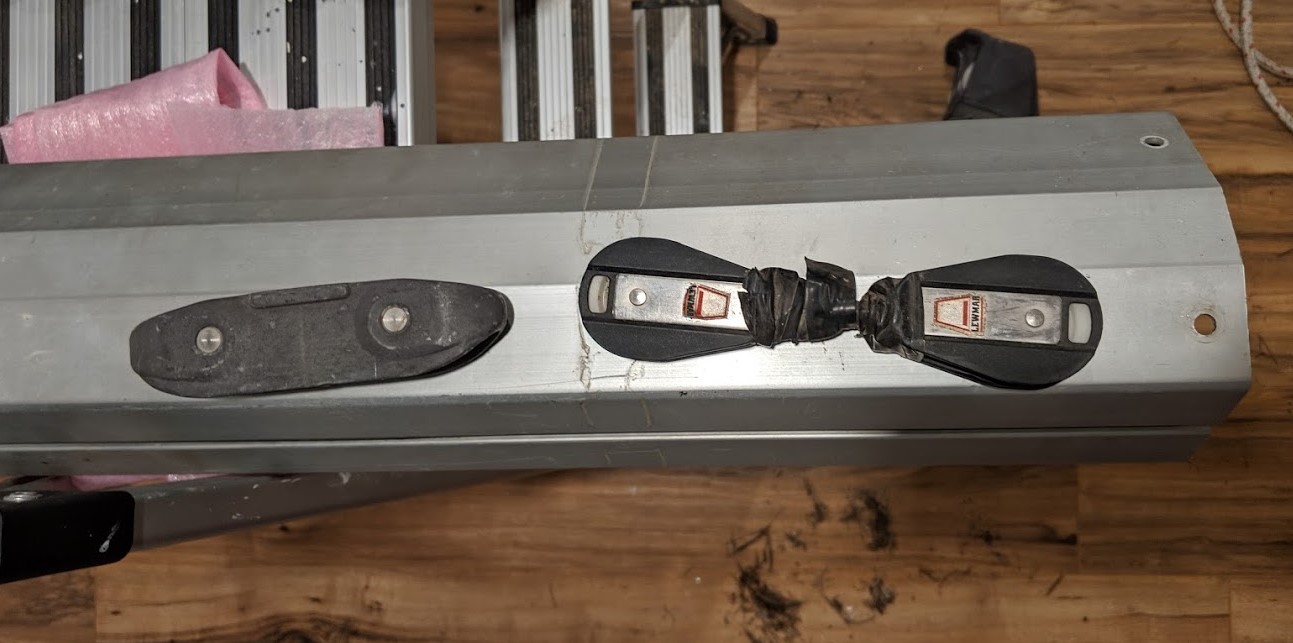
The shuttle block on the left is correct, the contraption on the right is a homemade feature. We are looking to purchase another shuttle block from Holland Marine with some hesitation, this little piece of hardware is $200! But I think the proper shuttle will have less chance to jam in the boom.
The other end of the boom looks to be in decent shape. Just planning on cleaning up and lubricating the pulleys with silicon spray.

Next steps
Now that we have all of the lines removed from the boom and measured we are ready to purchase the last of our lines.
- Outhaul – 25 feet solid blue 7/16″ line spliced with 8 feet wire
- Reef 1 forward – 46 feet solid green 3/8″ line whipped both ends
- Reef 1 rear – 22 feet solid green 3/8″ line whipped both ends
- Reef 2 forward – 60 feet solid red 3/8″ line whipped both ends
- Reef 2 rear – 24 feet solid red 3/8″ line whipped both ends
Need to order a new shuttle block from Holland Marine.
Figure out an efficient way to clean out all the crud from the inside of the boom.
Clean and lubricate the pullies on both ends of the boom.
I have the correct replacement rivets, but my rivet gun isn’t big enough to handle them. Will need to either rent or buy a new tool.
See our next post: Isomat Boom – Putting it all back together again to see how we figured it all out.
Lessons learned
There are five rivets – after removing four rivets the end still wouldn’t budge. We thought it needed to be lightly pried or tapped. But it comes off a lot easier if you remove the fifth rivet, slightly hiding within the track.
Keep on drilling – out of five rivets, we perfectly drilled two of them. The perfect drill is where your drill bit has gone flush with the aluminum and has slightly countersunk the rivet. One quick tap with a nail in the center and the full rivet pops out nicely. The other three we left some of the rivet exposed and I think it was still slightly flanged out holding the rivet in place. When I hit the center the middle part of the rivet popped out leaving the sleeve of the rivet in place keeping a solid hold. I then had to go back and drill more of the rivet off to get it flush with the boom and used vice grips to try and pull from the inside.
- Time to drill out a rivet properly, approx 2 mins.
- Time to drill out a rivet improperly, approx 30 mins + cuts, swearing, and bruises.
One of the rivets just wouldn’t pop out so I eventually drilled it right out. Starting at with a smaller drill bit and when to the next size up, then next size up until my drill bit was the same diameter as the hole. I took a bit of a gamble, if the drill bits weren’t lined up exactly in the middle I would have dug into the aluminum of the boom. Fortunately this didn’t happen.
Lori now likes shopping for tools – yes, you heard that right. This is a positive lesson learned for me! She casually mentioned this in Canadian Tire as we were looking at tools for the boat. The boat brings Lori happiness and now that happiness is extended to the tools that are used on the boat. I am so proud of her and happy that we are together!
Additional Information
Here are some additional diagrams I’ve seen posted on the CSOA forum by Steven that are useful for understanding how these are setup.
Sheaves
Also found out from a CSOA member, Craig, that the sheaves (pulley wheels) are all 60mm.
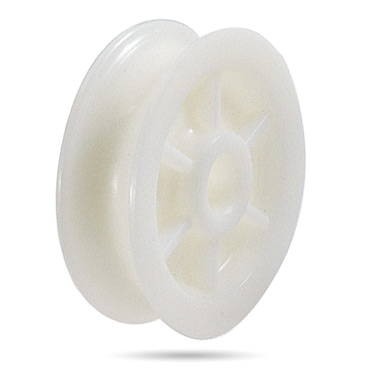
Exactly the same as most of the sheaves on the mast head. Information from Rigrite. NB2 Boom Sheave: NG1-4: Acetyl Sheave is 60mm (2 5/16″) OD x 14mm (9/16″) wide x 10mm (3/8″) ID.
These things are ridiculously expensive. At Marine Outfitters the Isomat Sheave 60 x 14 x 10mm are listed at $59 CAD each!


April 17, 2019 at 9:12 pm
Also I replaced the shuttle with a low fiction ring and added a second for a 2nd reef, this was suggested by someone on csoa. I will have to review receipts for the size. The ends of my boom are attached with stainless allen key bolts.
Kevin
April 18, 2019 at 8:27 am
Kevin, great idea on using a low friction ring. Much cheaper and simpler solution. I found your discussion on CSOA here: https://groups.yahoo.com/neo/groups/CSOA/conversations/topics/44883
Allen key bolts sound like a much better solution than rivets. Did you do this yourself, and where is a good place to find the allen key bolts?
April 24, 2019 at 7:46 pm
The allen key bolts where all ready inplace. If U have fastenal locations in Canada you may be able find them there.
August 11, 2021 at 7:14 am
I found that tapping the end caps and using stainless 1/4-20 Phillips screws was the obvious fix. The screw heads are not going to snag anything. Easy peasey.