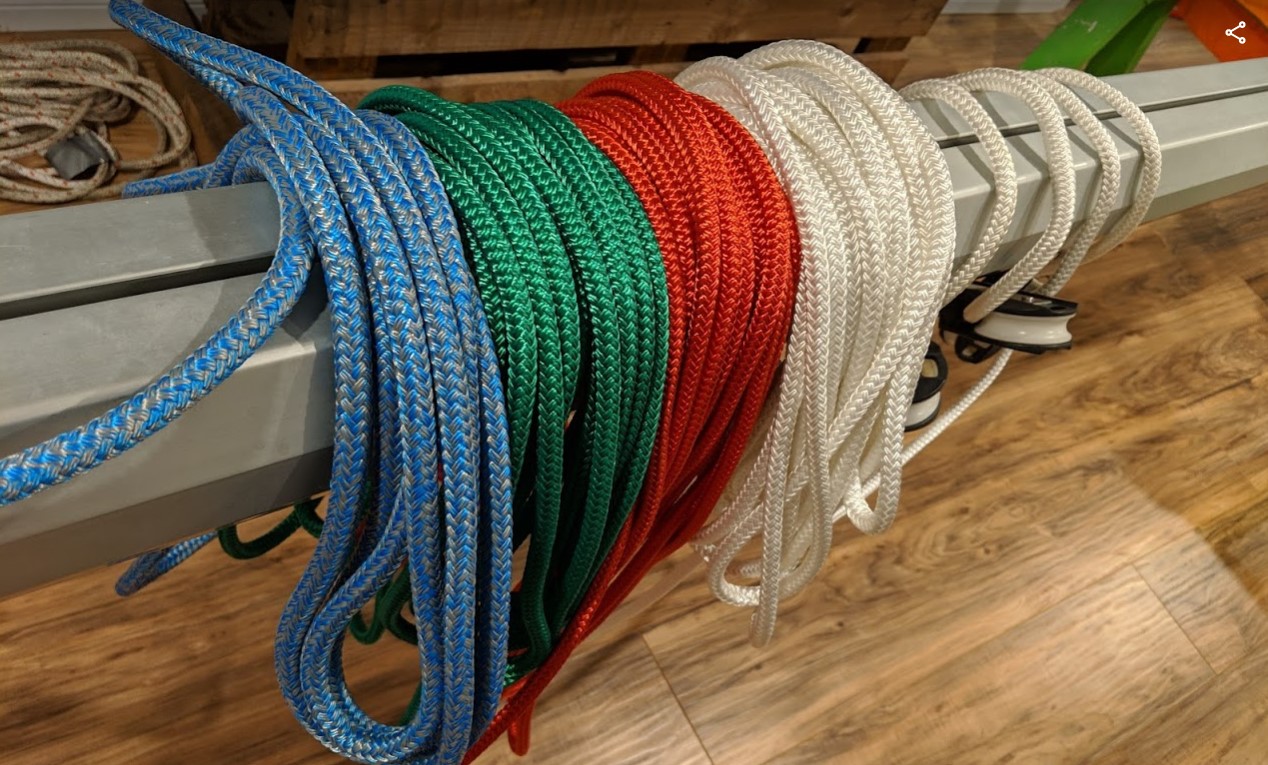
This year we are updating the running rigging on our boat. Our existing lines looked like they were sitting for some time and were getting stiff and brittle. Each line had a subtle colour difference but we wanted to make it easier to distinguish between lines. And there was the one minor incident where our son fully released the foresail halyard instead of releasing the first reef line. See the beginning of Waupoos to Kingston for that story.
There were a few options for buying lines that were suggested to us:
I spoke with Wilson Yates from Yates Custom Rigging a few times via e-mail and he is an amazing source of information for the CS34 Sailboat. He provided me with the following information on the lines.
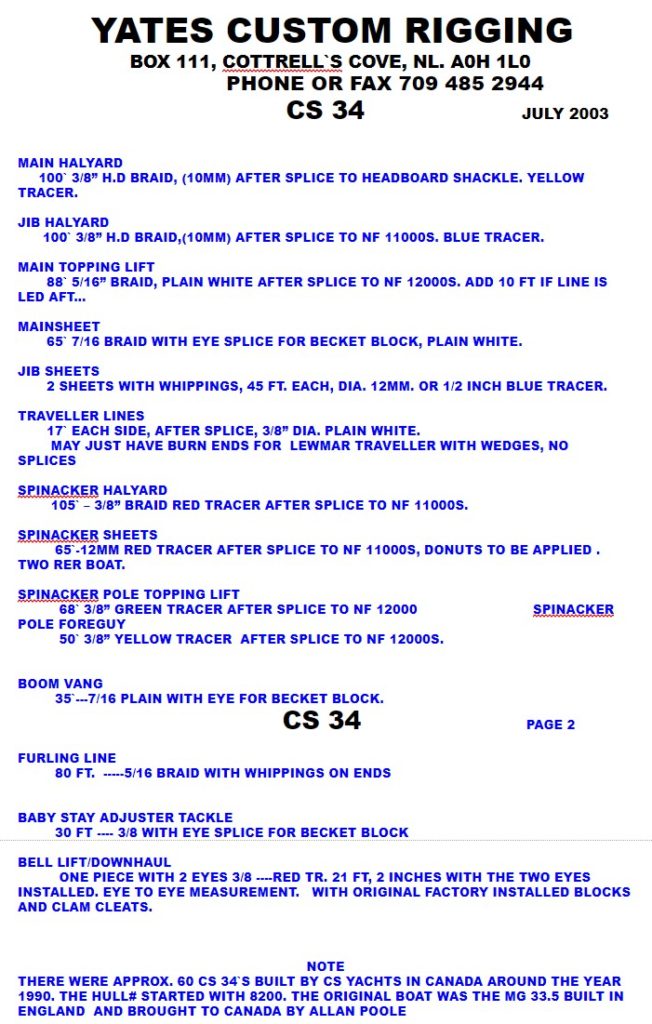
Unfortunately, Wilson wasn’t able to supply our lines, he didn’t have stock for what I needed. I used his list, along with some measurements I had taken of the existing lines and purchased most of the lines from Holland Marine.
Lines for mast from Holland Marine
Our colour choices was making it difficult. Holland didn’t have everything in stock and I did remember to bring all of the existing shackles from the lines from our mast I didn’t have the boom taken apart yet so I couldn’t have the wire outhaul spliced. So I ordered everything except for the lines needed for our boom.
| Boomvang | 7/16″ green tracer | 37′? | $30 |
| Topping lift | 3/8″ blue tracer | 100′ | $60 |
| Foresail halyard 1 | 3/8″ black tracer | 102′ | $61 |
| Foresail halyard 2 | 7/16″ red tracer | 102′ | $82 |
| Spin halyard | 7/16″ blue tracer | 107′ | $86 |
| Main halyard | 7/16″ black tracer | 102′ | $82 |
| Main sheet | 7/16″ white | 67′ | $53 |
| Whisker pole | 3/8″ green tracer | 70′ | $42 |
| Furling line | 3/8″ blue tracer | 63′ | $48 |
| Genoa sheet 1 | 1/2″ blue tracer | 45′ | $38 |
| Genoa sheet 2 | 1/2″ blue tracer | 45′ | $38 |
| Traveller 1 | 3/8″ black tracer | 17′ | $10 |
| Traveller 2 | 3/8″ black tracer | 17′ | $10 |
| Bell lift | 3/8″ blue dyneema | 25′ | $38 |
| Jack stay | ? | ? |
Peter at Holland suggested a few changes, we went thicker on some of the ropes. I didn’t have the exact colours I wanted, no gold tracers and no solid colours without a special order. The interesting one we are trying out is the furling line. He convinced me to go with a thicker rope so it’s easier to handle but the first part of the line that goes into the furling drum has been de-cored to make it skinnier. I will post an update at the bottom of this post after we’ve re-measured everything on the boat to see if our lengths were correct.
Add in the $16 per splice charge for all of the required shackles. Then add the taxes, the bill for new lines came to $1,030. This doesn’t include the lines in the boom.
Lines for the boom from The Chandlery
After I had taken apart our CS34 Boom, I now had the piece of wire required for the outhaul and the exact lengths of lines needed for our reefing lines. We had to be in Ottawa the next weekend so I placed an order online with The Chandlery in Ottawa. They had the solid red, green and blue lines we were looking for in stock.
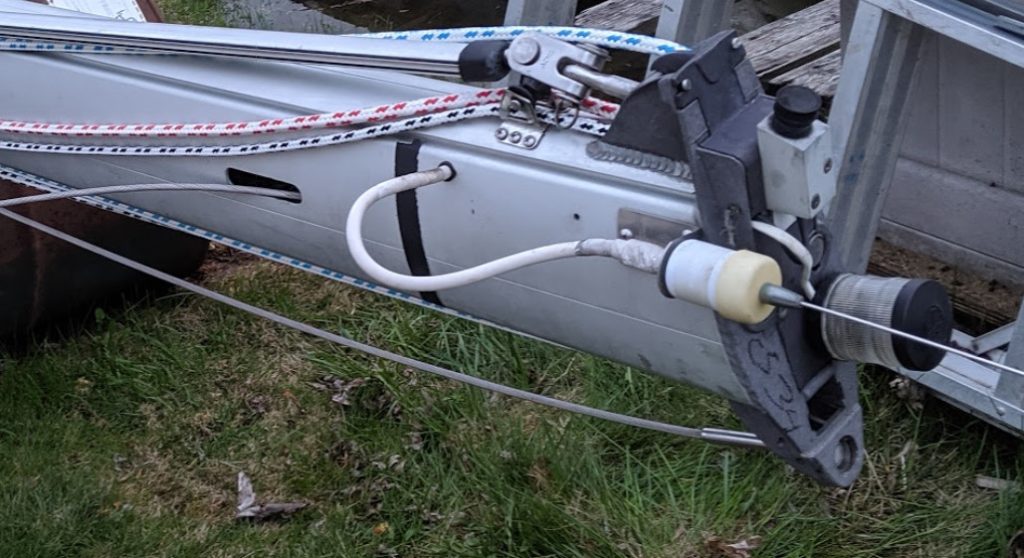
I decided to change things up for the outhaul. Instead of using the wire outhaul I replaced the entire line with dyneema; this was recommended to me by a comrade on the CSOA forum (thank you!). I’m not 100% sure how it is going to work but it seems like the stretch should be less than the original setup and it will simplify what’s sliding through our boom.
| Second reef 1 | 3/8″ solid red | 51′ | $29 |
| Second reef 2 | 3/8″ solid red | 24′ | $12 |
| First reef 1 | 3/8″ solid green | 38′ | $23 |
| First reef 2 | 3/8″ solid green | 22′ | $11 |
| Outhaul | 7/16″ dyneema | 34′ | $75 |
Total cost of the lines for our boom, with taxes, was $170.
Update 26-Aug-2019: Some of the lines we ordered were a bit long so we’ve gone ahead and shortened them and I’ve updated the lengths above. Lengths of all non-halyard lines are set so they all run to cockpit and then we determined the maximum length needed to the clutch and then added the distance between clutch and stern of the boat to the line. We figured this would give us three wraps on the winch and enough to tail. Halyard lengths are a bit longer to allow them to reach the water, if needed. Still not confident on jack stay and boom vang length.
What was the final cost for all the new lines?
Lines for mast were $1,030. Lines for the boom were $170. Adding up to grand total of $1,200 to replace all of the running rigging lines on our CS34 sailboat. A little more expensive than spending $147 for new lines on our Macgregor 26x a few years prior! It was a subtle reminder of the expense of a larger boat. Costs go up exponentially for each foot you add to the size of your boat.
Installing all the new lines
We had a few challenges to figure out with all the new lines.
- Opening up the boom and installing the new lines
- Running all the new lines through the mast
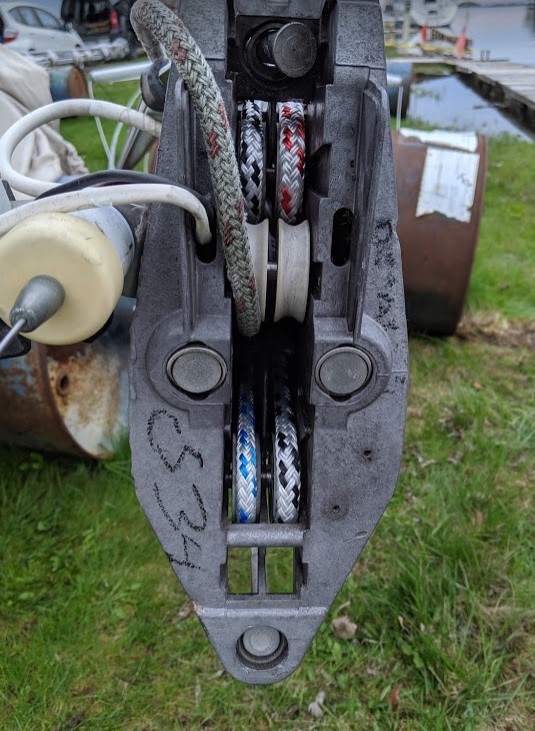
- Running all the lines through the blocks and under the line cover on the deck
All of this was new for us, but we had a plan.
Opening up the boom and installing the new lines
I covered this in the article: Isomat Boom Maintenance: Taking it Apart
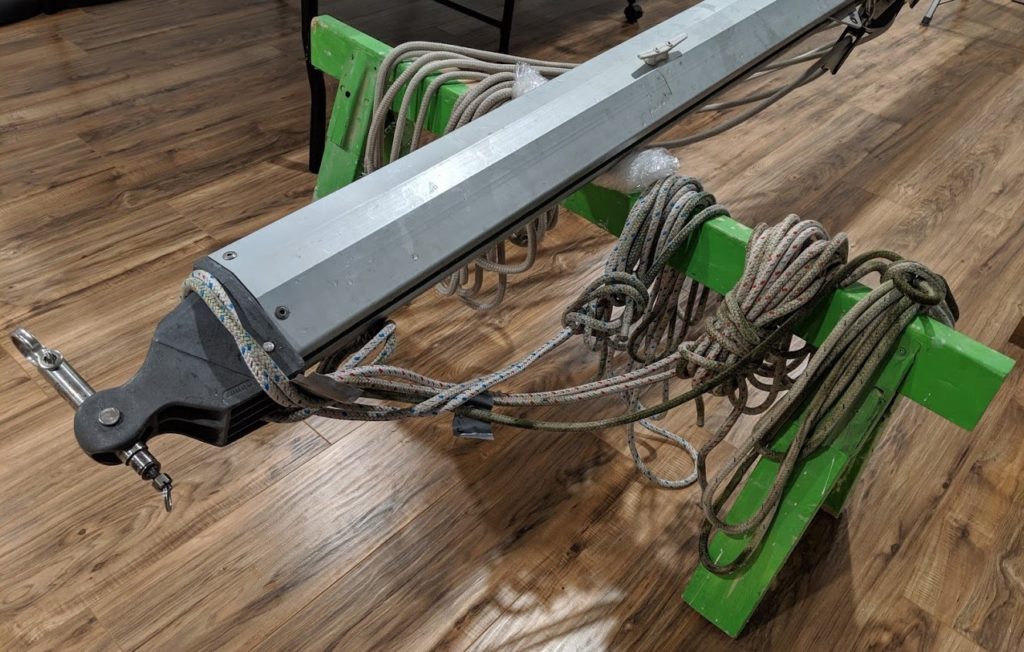
And describe the process of putting it back to together in this article: Isomat Boom Maintenance: Putting it Back Together
Running new lines through the mast
We were not 100% sure how this was going to go. I was preparing myself for the worst of snagged lines, new lines detaching from the tracer lines inside the mast, broken pieces, etc. But with the right tool and discovering the removable plate on the top of the mast it was much easier than I expected.
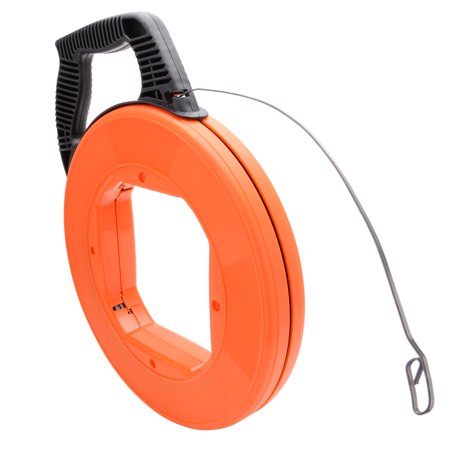
Let’s start with the right tool. I’m going to sing the praises of this tool one more time and probably a few more times in the future. We started with tracer lines and sewing and taping the new lines to the tracer lines to pull through the mast. But we found using this tool was much easier.
The next discovery was the plate at the top of the mast can be removed. Making it easy to access the sheaves (pulleys) and properly thread the lines through the right way.
To access the plate I needed to first remove our anchor light. Also added “new anchor light” to my list of wants, an LED would be nice. After removing a few screws the plate levered off a hinge at the aft part of the mast. And we could now see clearly into the mast.
The sheaves, can be slid out for inspection and cleaning. Ours were a little discoloured but in good shape.
Also inspected the three (plugs/end caps?) for the shrouds and they all looked good. After all the lines were replaced we ensured the lines correctly around the sheaves. We had to triple check. We sealed it all back up. All the lines were then bundled at the base of the mast and secured so that it would be easy for the crew to hoist the mast back onto our boat.
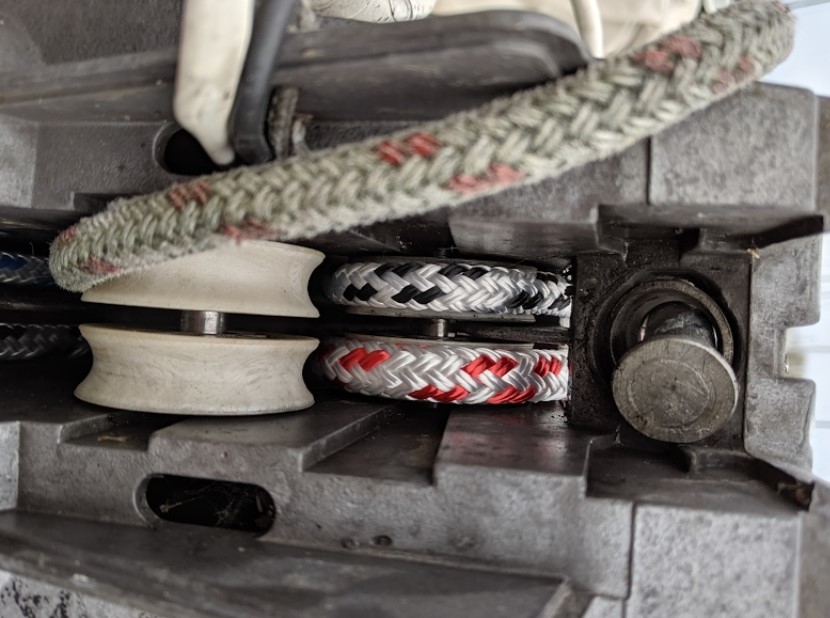
Running all lines to the cockpit
Before pushing the lines under the deck cover we quickly cleaned it out. Originally we planned on removing the deck cover but discovered it would be a lot more work than we thought. The cover extends right back to the companionway and would require pulling the rails. We decided against that lengthy task and instead came up with a solution to scrub underneath.
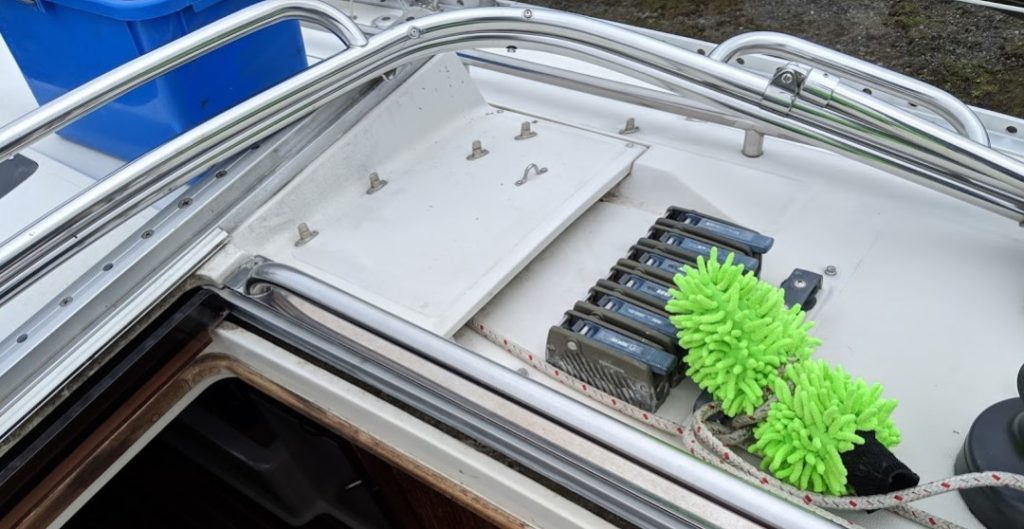
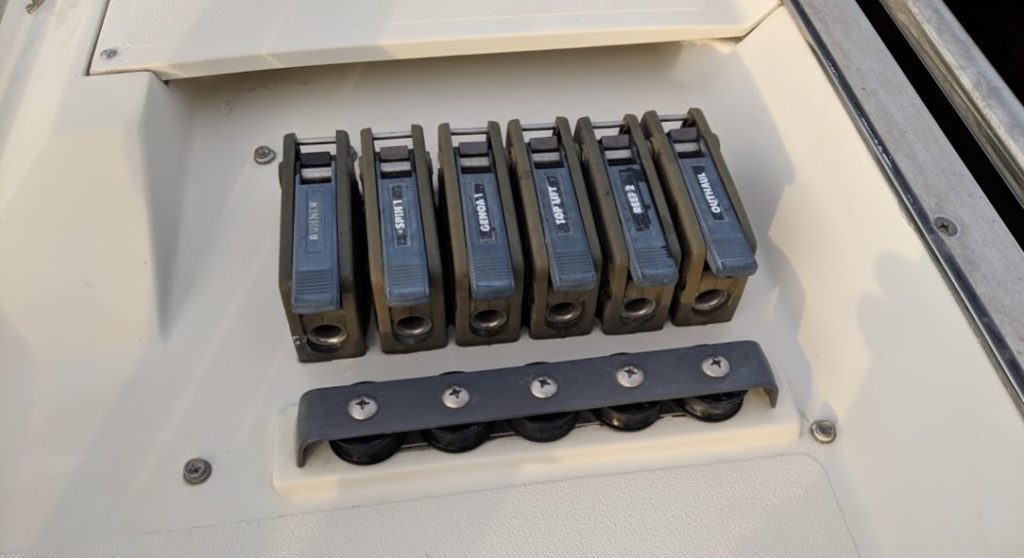
We tied a cloth to the middle of a rope and then slid it back and forth under the deck cover. Not perfect, but much better than it was before! Note: the current labels on the clutches are wrong.
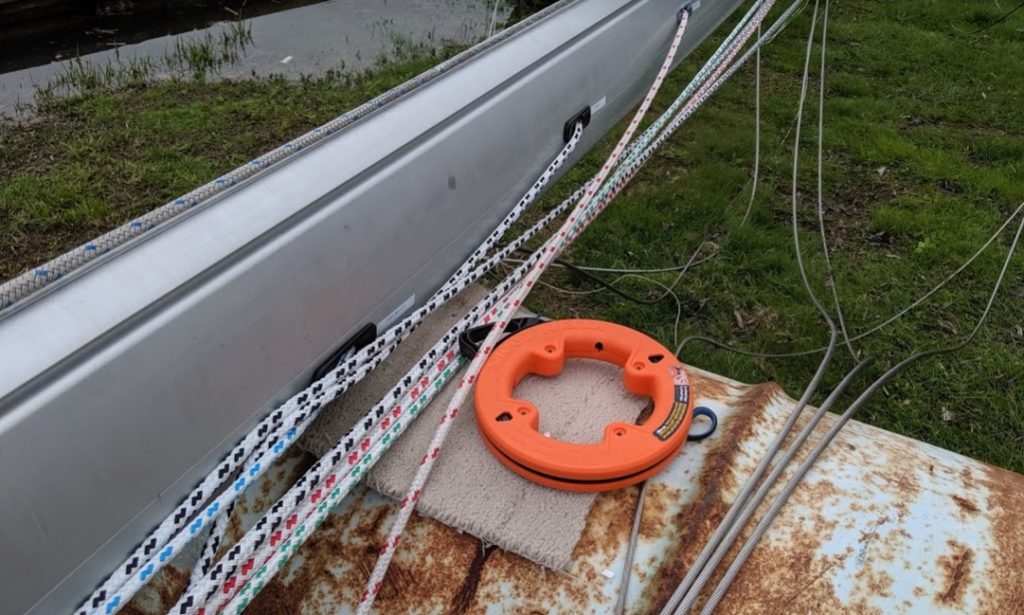
I thought threading the lines was going to be a lot more work than it was. Last fall I took 100+ photos of all the lines and blocks as reminders where they would all go. And for the most part it was pretty obvious where the lines should go. And once again, my fish tape was my tool of choice for feeding all of the lines under the line cover. It was a quick job.
Here’s the lines right after rigging it.
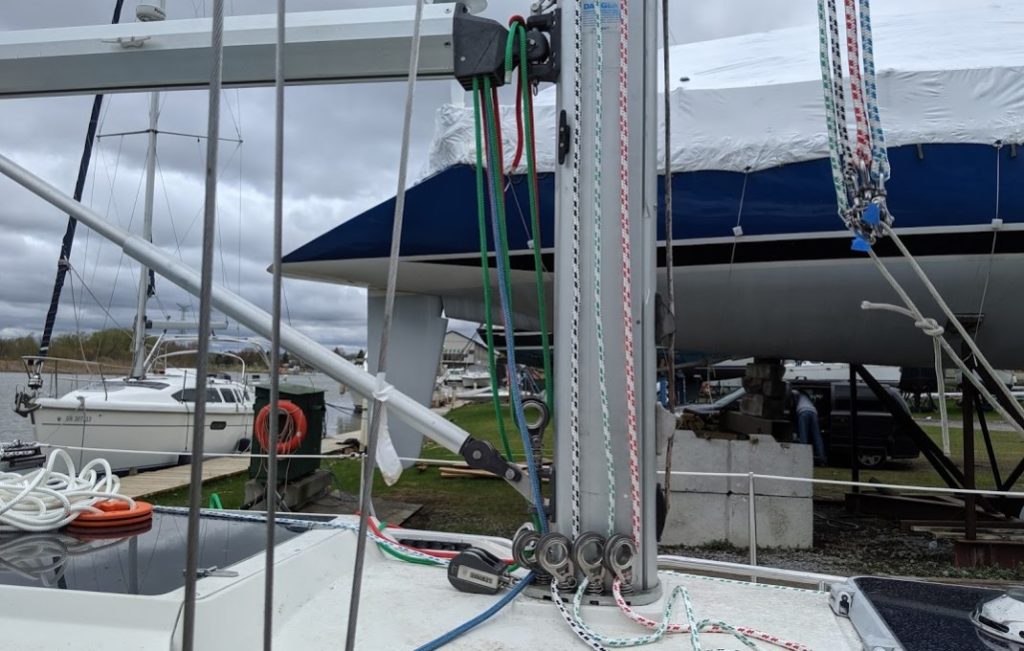
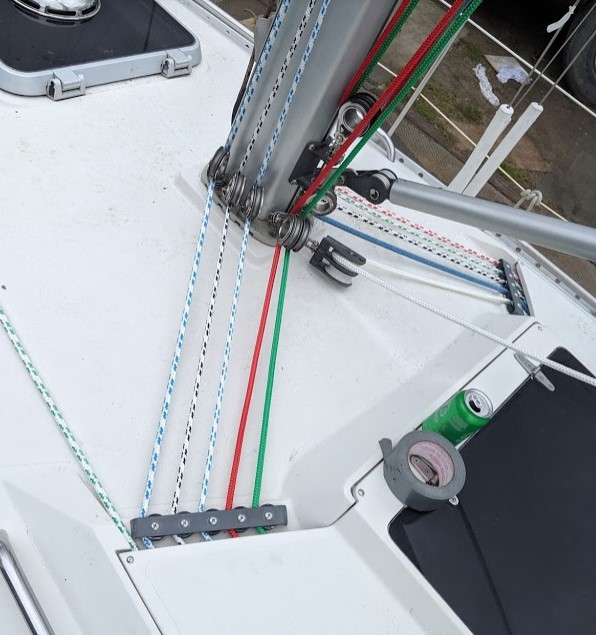
Note: Boat is still covered in dirt from the crew stepping our mast. Next year will spend less time making the deck spotless before this happens!
A few changes and issues.
- We have two new halyards. One aft and one forward of the mast. We wanted this to allow us to double up the lines when using the Bosun chair, will give us some extra options for hauling things up using the winches and want to see if we can rig up a hammock using the spin pole.
- Decided to use one of the clutches for the foresail furling line. I think this was how it was originally rigged. The line goes straight back through the fairlead on the deck. We’ve since tried this and like how we easily furl and reef the foresail.
- We need an extra clutch now. This is where I messed up. I’m not sure where I can run the boomvang line. Notice there’s no line on it at all right now. To be honest, we barely used it last year. We are just now starting to learn how to change the shape of our main beyond the main sheet.
- We didn’t have the option for a gold tracer from Holland Marine without special ordering it. So I have two lines on port side that have blue tracers.
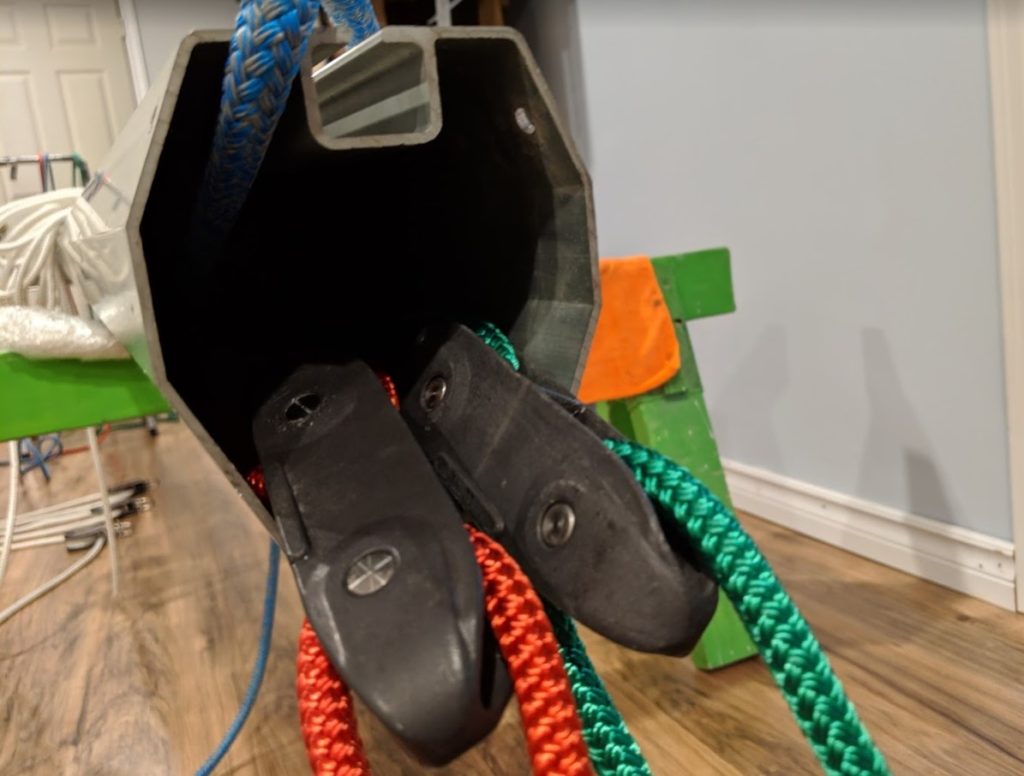
- I messed up on our reefing lines (green and red solid). I ran them out of the forward side of the boom facing up, but realized they needed to run down to the blocks on the deck before going back up to the main sail. We were able to squeeze our fingers in there to adjust without having to take the boom apart again!
Not done yet
I ordered all of the lines a little bit long to avoid a costly mistake of a line being 1′ too short. We need to take the boat out on a calm day and mark the minimum and maximum used length of each line and decide how short we want to cut them. I’ll post an update when we do this so you know what lengths we ended up with. So far they look pretty good except for the reefing lines seem like they are at least 10 feet too long, oops.
After cutting the lines we found an electric hot knife works best to cut and seal the end we then whip the end and go back with the hot knife to melt the end to the whipping.
Still need to figure out the boom vang line.
Not 100% sure about the placement of the furling line to the clutch. I really like the simplicity of this compared to running it down the side of the boat, but it does slightly get in the way of the forward hatches and anchor locker. May need to move it back so we have a spot for the boom vang line. Or maybe one of the halyards doesn’t need to go to the cockpit.


September 7, 2020 at 5:38 pm
Was the outhaul on any sort of internal pulley/guide, or was just fed straight through the boom?
Thanks!
September 7, 2020 at 8:52 pm
Hi Lori, I was surprised but our outhaul just went straight through the boom. Others have shared documents showing various pulley systems in their boom. I posted a picture from Yates Custom Rigging in my post here:
https://www.foghornlullaby.com/2019/04/isomat-boom-maintenance-taking-it-apart