Our first DIY sail repair
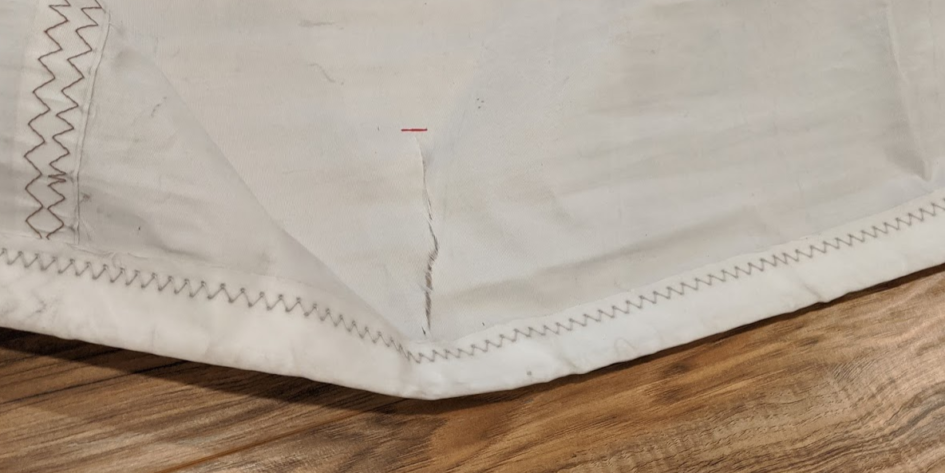
At the end of last season, we noticed a tear on the leech of our foresail. Come Spring, we found two more. We think our sails are 30 years old, so this is understandable.
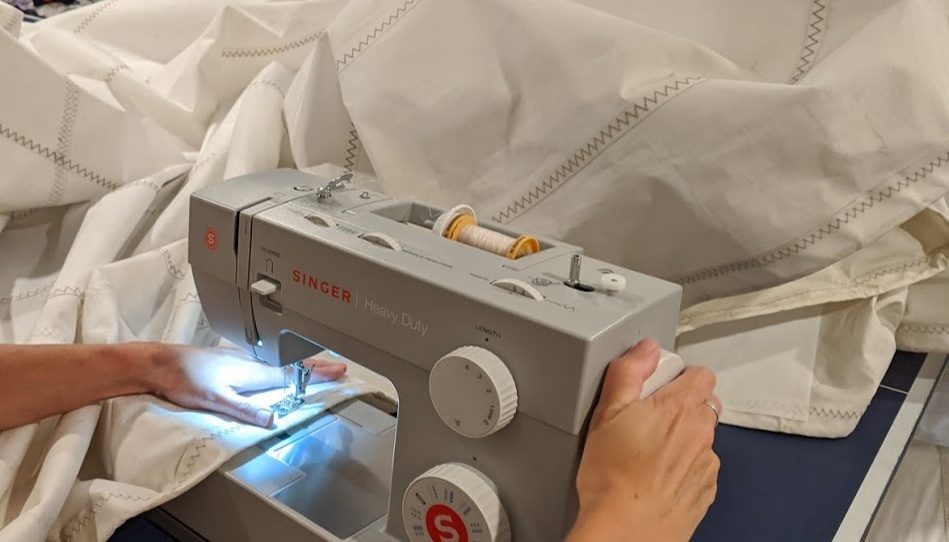
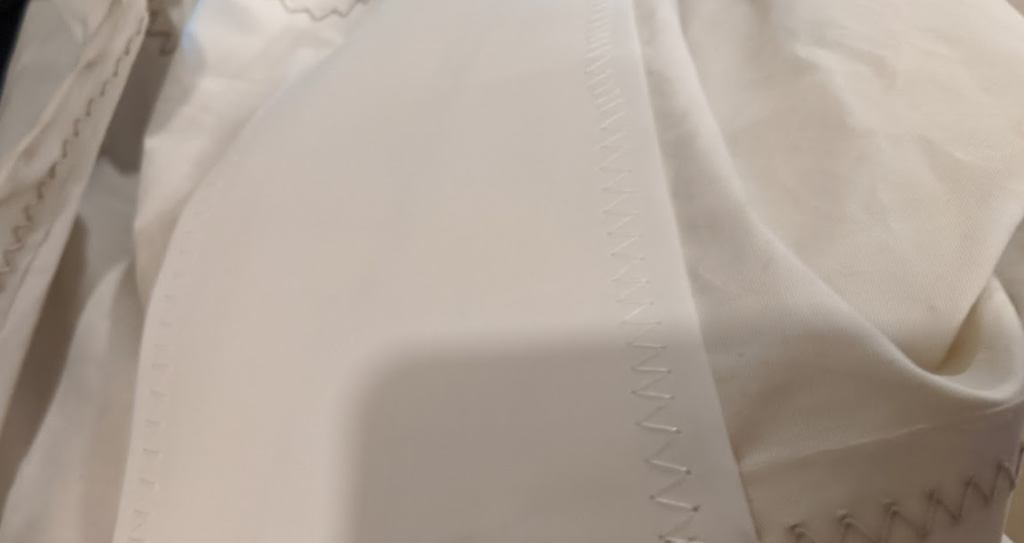
We were both filled with dread about this item on the to-do list. Procrastination was our best friend, until the evening before we had to sail back to Cobourg. Both of us ended our work day a bit late, so that didn’t help. We gathered our courage, cracked a beer, cheered each other to keep our heads, and set to work. Other than a quick disagreement about the size of our patches and a nervous Nelly when the sewing machine was running (ahem…Shane), the repair went smooth (much better than our gel coat repairs).
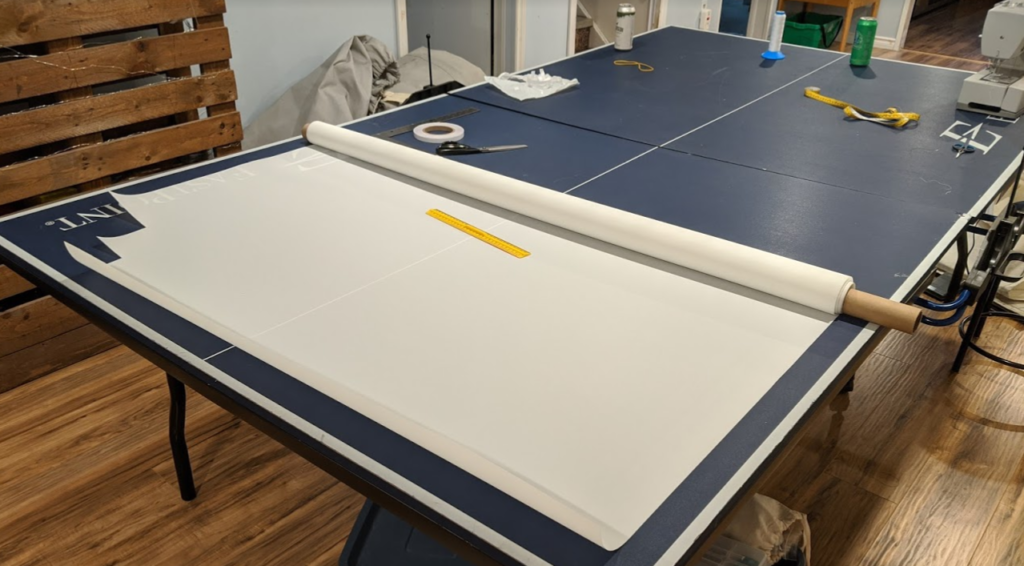
Tips: we used a large surface area on which to work (our ping pong table). Shane maneuvered the sail, while I sewed. I sewed each seam separately, in that I sewed all seams running parallel to each other on all three patches, before sewing the perpendicular seams, again on all three patches. This prevented the need to rotate the sail several times and an expensive divorce.
Equipment: Singer, heavy duty sewing machine.
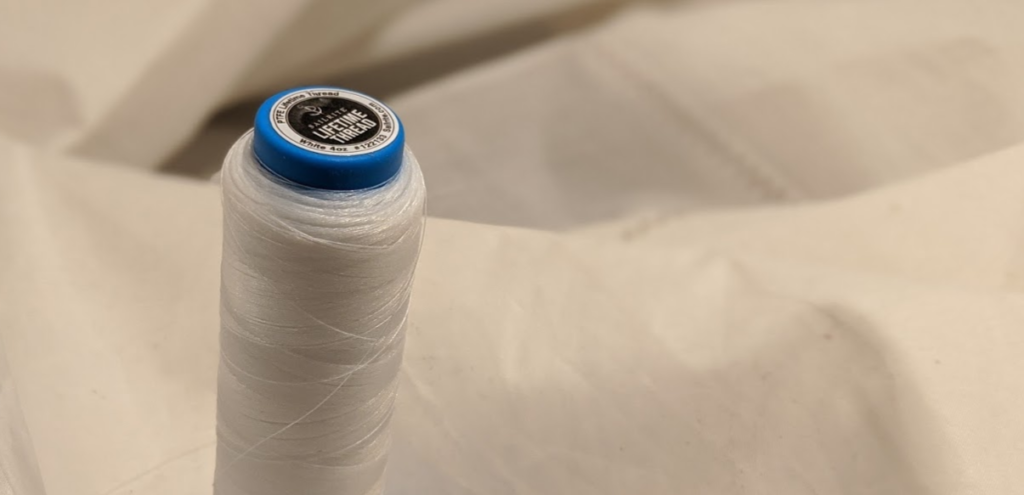
Supplies (from Sailrite): Seamstick 1/2″ Basting Tape for Sailmaking & Vinyl (50Yds); Sailrite PTFE Lifetime Thread White 4oz Cone (825Yds); Dacron Supercruise 8.4oz White Sailcloth 54″.
Notes regarding supplies: The spool of thread didn’t fit my machine, so I had to hand-wind onto an empty, smaller spool. I could only achieve a zig-zag stitch of approx. 4 mm on my sewing machine. I ordered 2 yards of Dacron, but would have had plenty with a 1/4 yard.
Cost: approx. $250 for supplies that will provide for multiple repairs over several years.
Here’s the video that helped me:
Success (out of 5): 5, we think, but time will tell.
Stress level (again, out of 5): 5 (anticipation); 0 (reality).
Bevies: Bobcaygeon Birch Bark (Shane) and Steam Whistle (Lori).
Music: The war and treaty.


July 11, 2020 at 9:55 pm
I have the same sewing machine and have been impressed. Tonight i sewed through 2 layers of fabric and 2 layers of plastic windows repairing a spot on the Dodger.
Looks like u did a really good job!
July 14, 2020 at 6:06 am
Thanks Lori! It is a good little machine. Sounds like you’ve been busy with repairs.