We had most of the solar equipment for our boat selected and purchased. But we were stuck on the most difficult part, how to mount the solar panels on our boat.
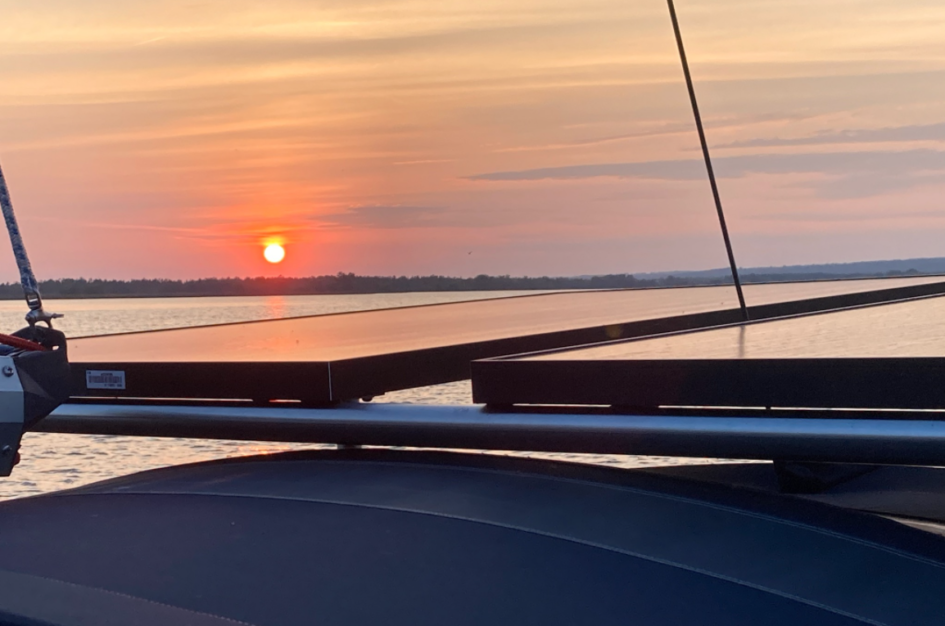
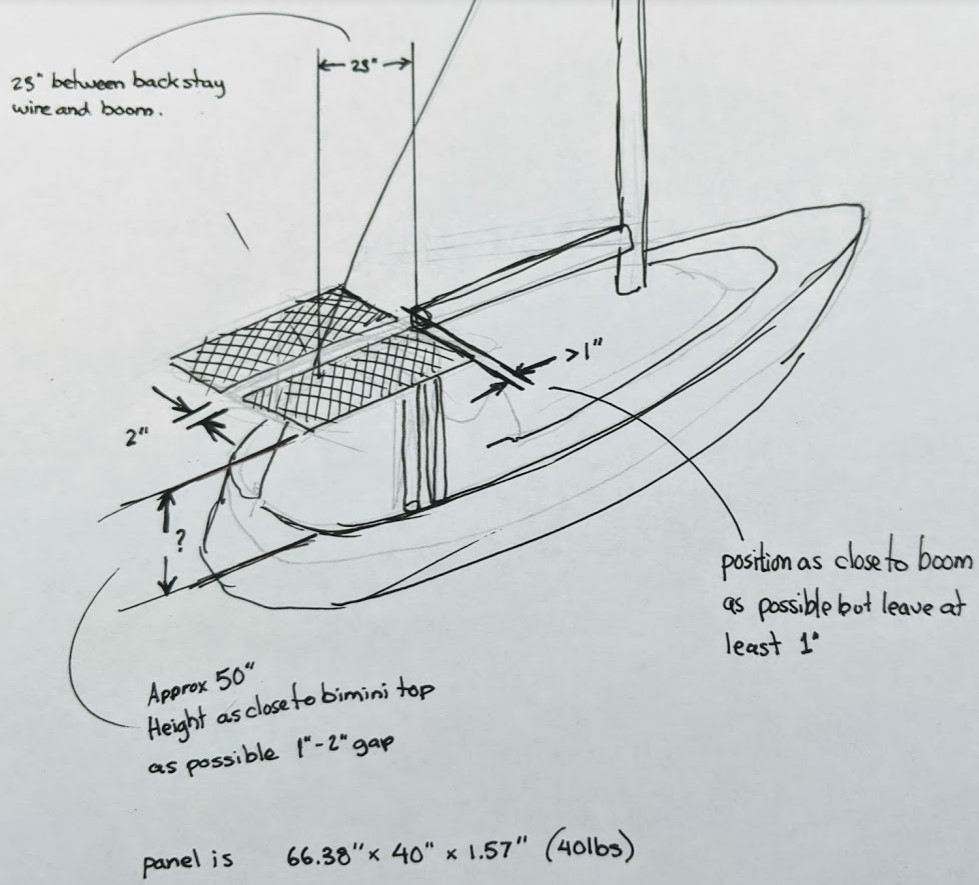
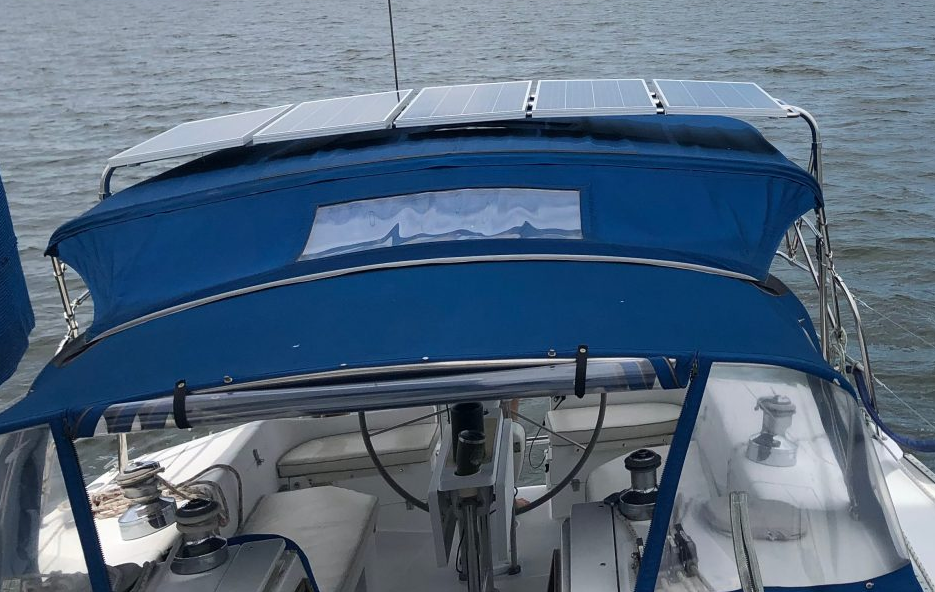
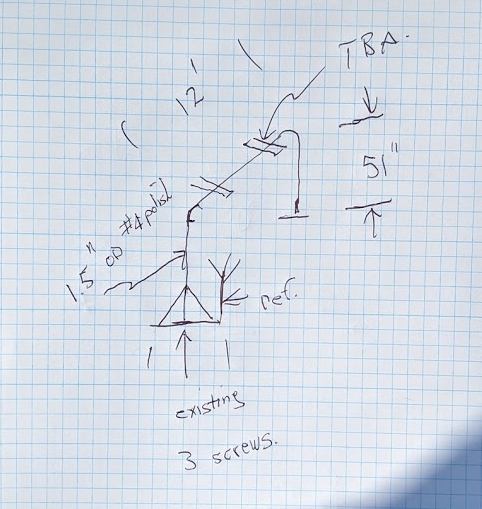
The only thing we were sure about was where we wanted the solar panels to sit on the boat. We wanted them at the stern of our boat above the bimini. Here are some of our first notes and sketches of where we wanted the panels to sit.

The diagrams above just have the panels magically floating in the spot we wanted them to be. This location would have the least amount of shading on our boat.
There were a few possibilities we explored:
- Build off the davits. These are firmly mounted on our boat and would make a good anchor point. But we struggled with a design that would lift the panels high enough so we can still use our sugar scoop.
- Attach to the bimini. This would have probably been the easiest. It would mean cutting holes in our bimini at the attachment points and we were concerned about the weight of our panels, they are much bigger than the panels we’ve seen on other biminis.
- Purchase a pre-built arch. This looked appealing, but they are expensive and nobody close by had stock. Could have ordered one to be delivered. But we weren’t comfortable with what would happen if they didn’t fit properly or the build quality was bad. I did like the simplicity of this to form part of our rear pushpit, replace the existing davits and hold our solar panels.
- Custom build an arch. Find a local stainless welder and have them custom build an arch to hold the solar panels in the exact position we wanted.
Photos of ideas we were exploring

It was these last two pics and a fantastic write up from Kestrel Sails that made us decide that this is the way to go. We couldn’t find a pre-built version that was easy to ship so we found a local stainless welder that had experience with boats.
Working with a Stainless Welder
We went with Vout Welding, a local company just minutes away from the marina.

The owner came out to look at the boat and discuss options. He was a great guy, lots of experience and good stories. He did a rough sketch and provided me with an estimate.
He assigned this job to one of his welders, who later came out to the boat for some more detailed measurements and I also dropped off our solar panel so they could fabricate the brackets to size.
I provided them with the diagrams above, and told them I would leave it up to them to figure out the best way to secure the panels. They are the experts and I’m not an engineer. I just told them I like things to be solid and would like to do it once and not worry about it.
After seeing the size of the solar panel, they decided to change the plans to make it beefier. The frame became a lot bigger!
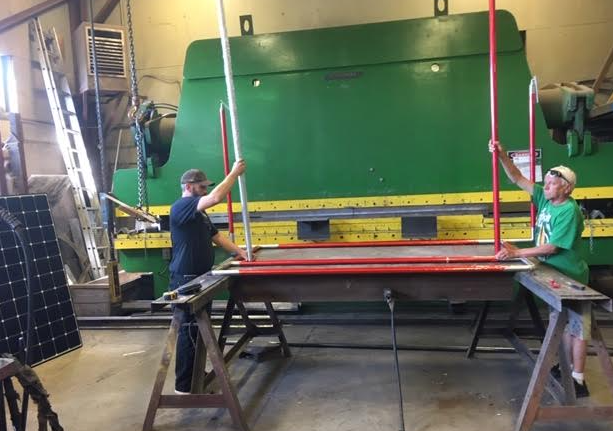
Talking with the welder, it would have been a breeze if our boat was in the shop. He had to spend a lot of time going back and forth, putting the frame on a truck dry fitting it on the boat, then driving it back to the shop to weld.
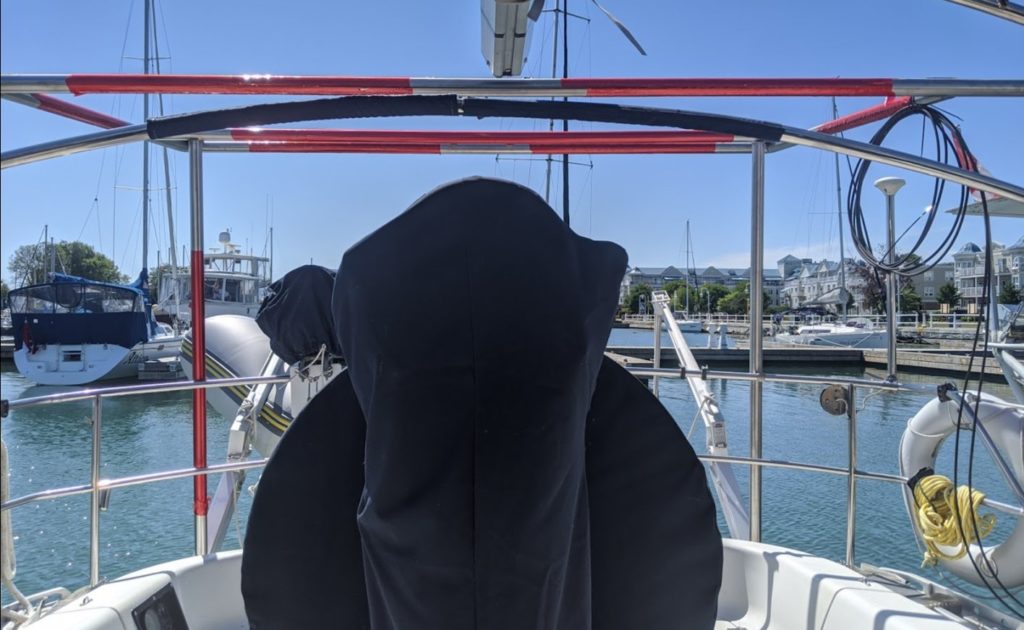
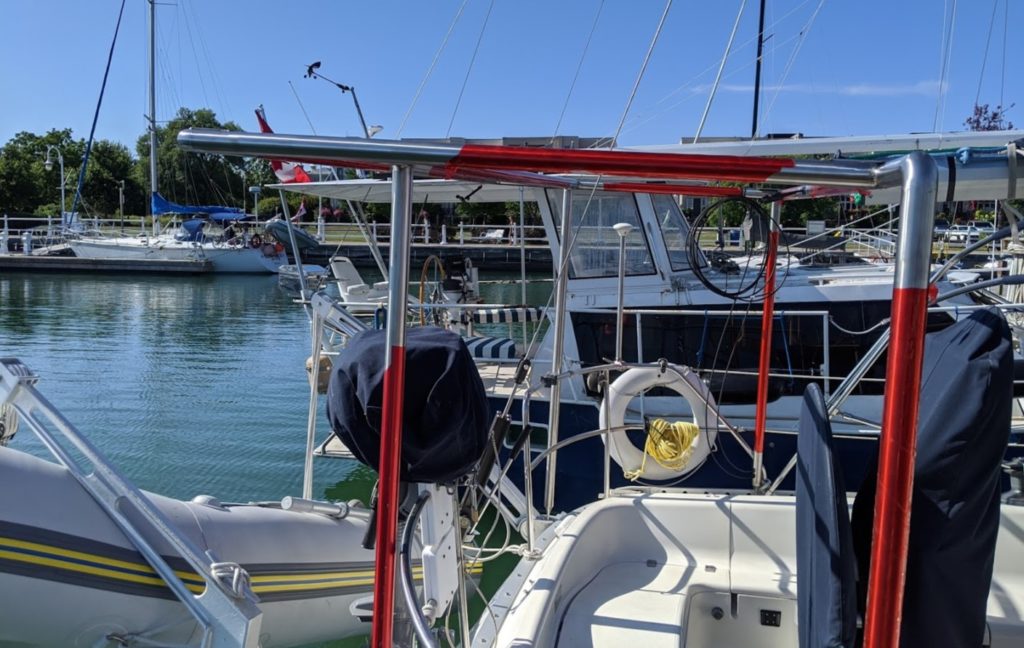
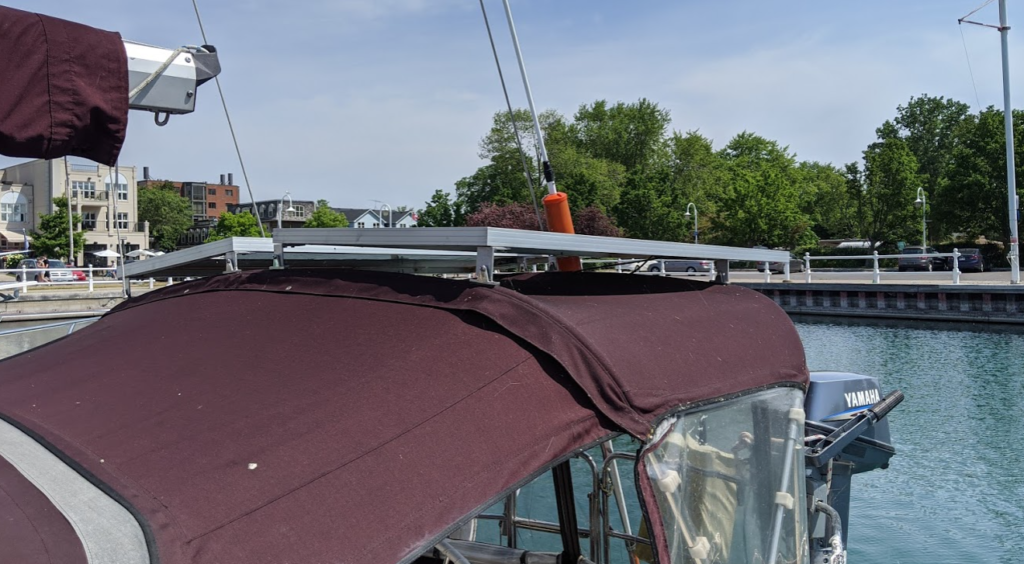
Check out the side profile above. This is the only thing I wish I changed. They asked me how level I wanted it and I made the comment that I would prefer for it to lean forward rather than backward. My thoughts were there there would be less chance of catching air. So it’s leaning forward, more than I expected.
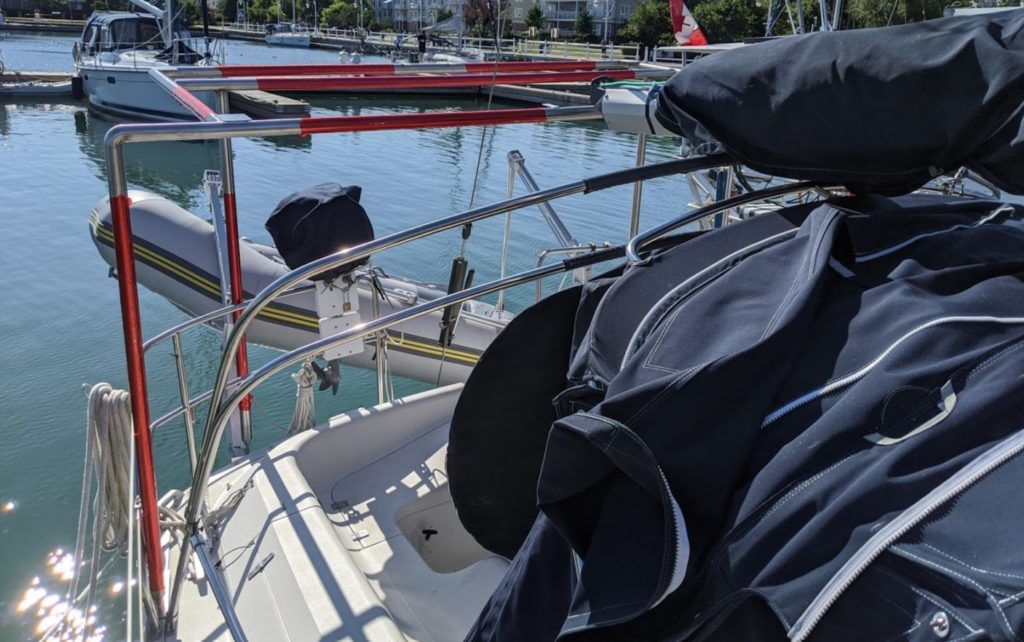
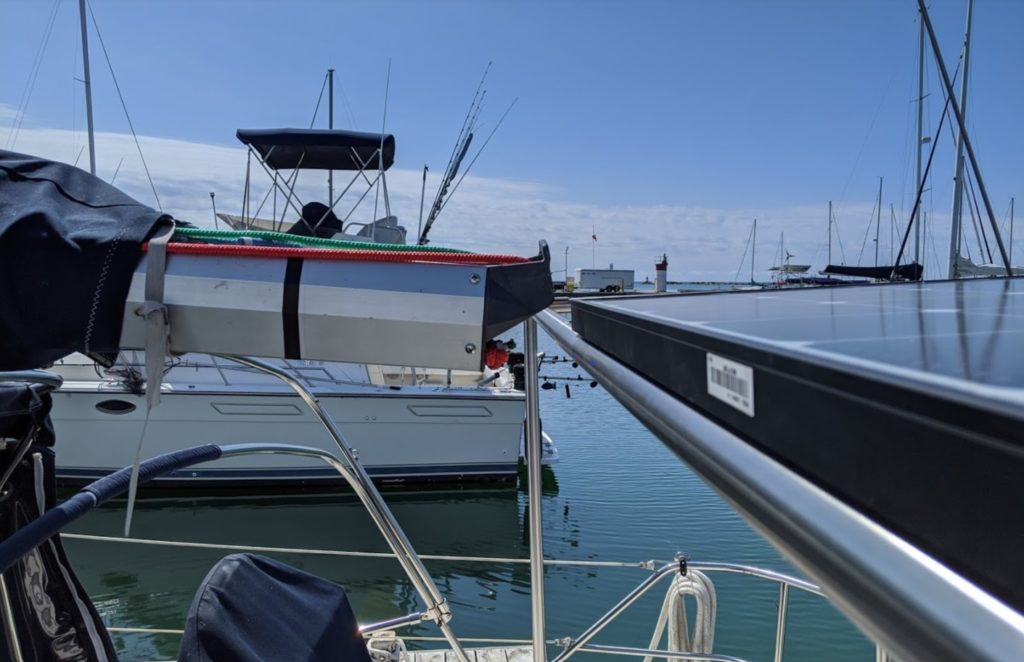
This frame was attached to the boat in four places. We used the toe rail for the forward attachments.
I liked this option because it meant we didn’t have to drill any new holes through our deck. Not a big fan on the adjustable pivot point used but it made it easier for them to adjust for minor differences in spacing. You will also see the two power lines coming out, the solar wires are run internal to the frame.
The two attachment points on the rear of the frame, sorry no pics, are attached to the beefy end of our davits.
We attached our solar panel, and it fit perfectly. It’s holding it right at the edges, there’s no chance for the wind to grab and twist the panel.
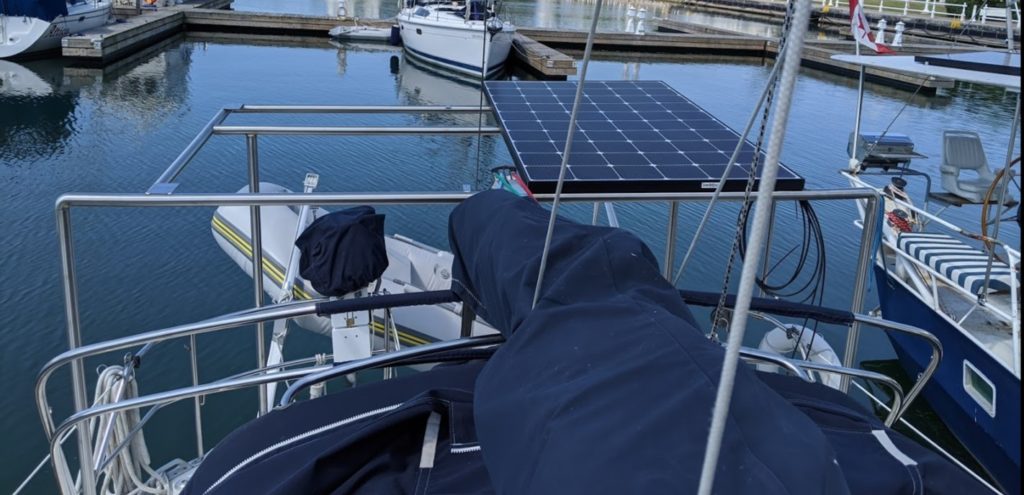
They got the distance between the panel and our boom just perfect. Close, but no chance of hitting. It also fits nicely just an inch above our bimini.
During this install, I had been struggling to find a second solar panel. Our original supplier was unresponsive and eventually told us they couldn’t get the same solar panel anymore. Others wanted to sell them in minimum quantities of 10 panels. Eventually I found a supplier in Montreal that had them in stock and willing to sell just panel. So, off I went to Montreal.
It was a fully day of driving, there and back, but I like road trips. The company is called Volt Energies, and they were fantastic.
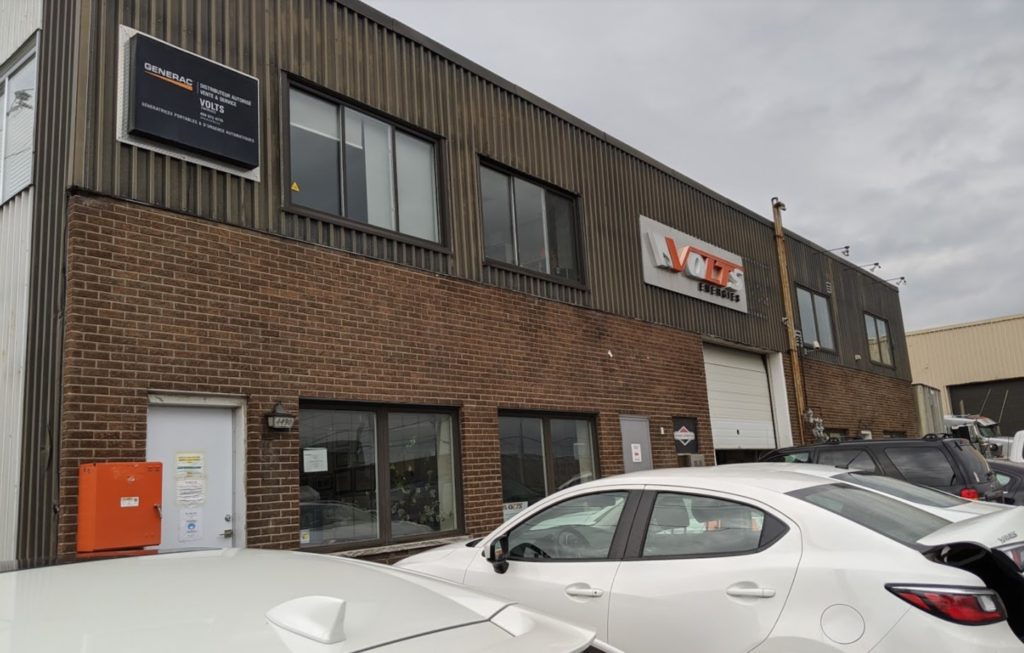
They also custom build lithium battery banks. This would result in a bank that fits perfectly in the available space on your boat. But not cheap. Something we may investigate in the future.
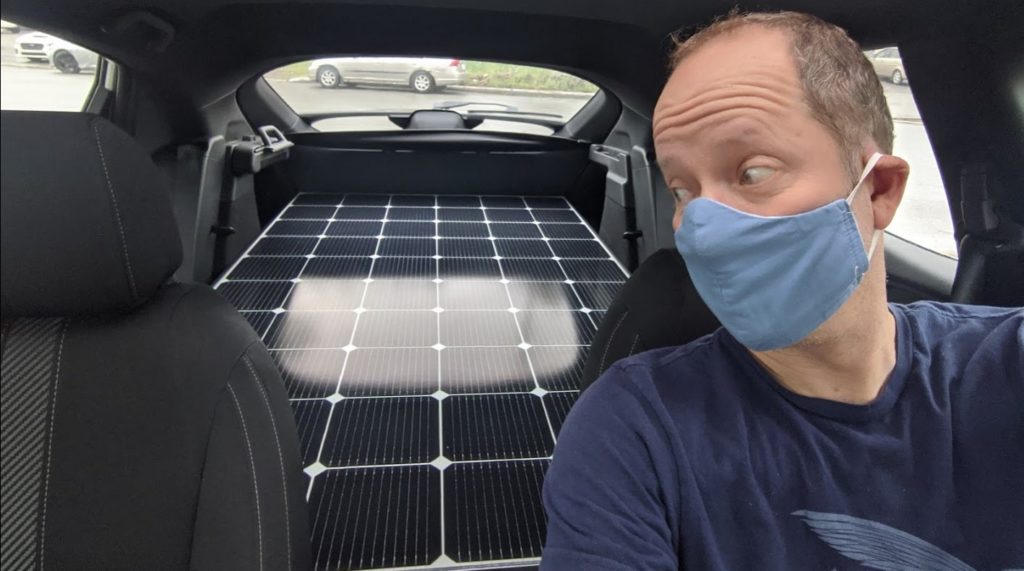
I impressed them when I told them the solar panel would fit in our little Honda Civic. Just like the previous, it squeezed in with millimeters to spare. Brought it back to the boat and quickly installed it next to the first. The boat now looks a lot more balanced!
Wiring
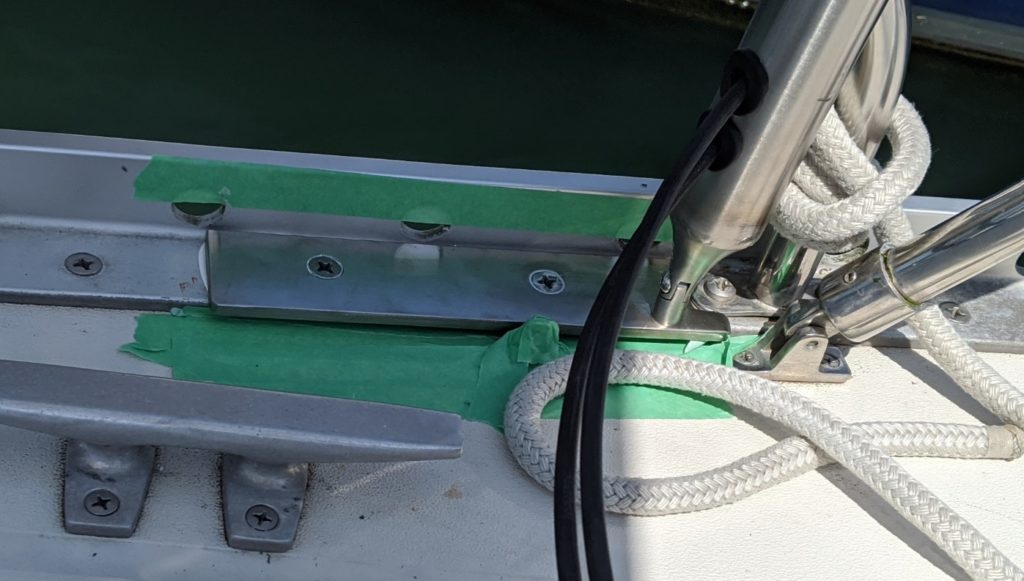
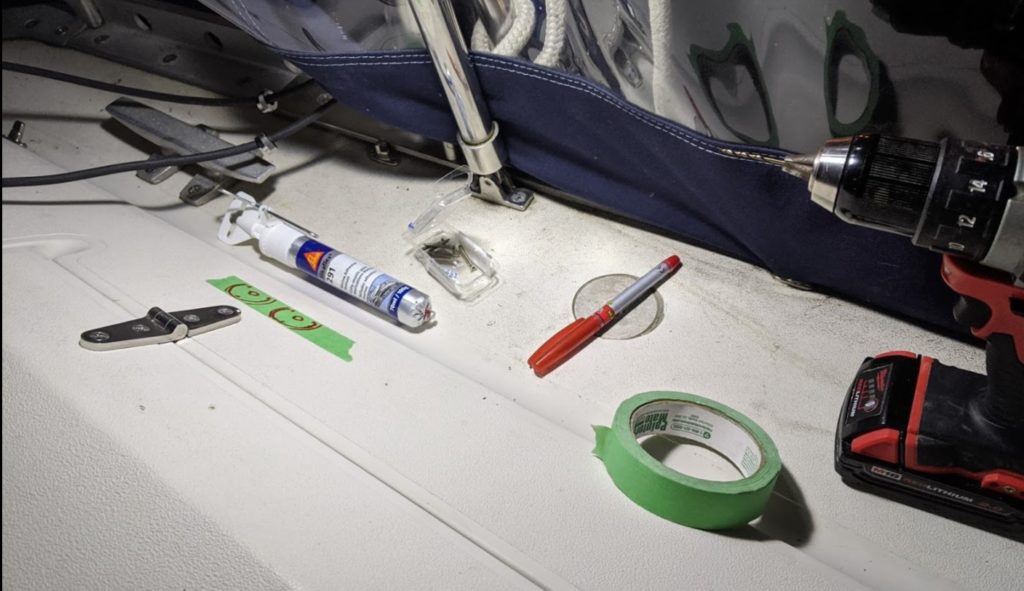
As you already saw above, the wiring is mostly hidden within the stainless frame. Two wires come out on the port side near the deck. I looked at various deck glands to allow the wires to go into the deck and eventually decided on this solution.

I did have to drill two holes through our deck. I put them on the angled part of the cockpit where it was less likely for water to pool. I used painters tape to mark the location and protect the deck as I drilled the holes. I measured at least five times and then reluctantly drilled. I still hate drilling holes in our boat!
Here’s the final result.
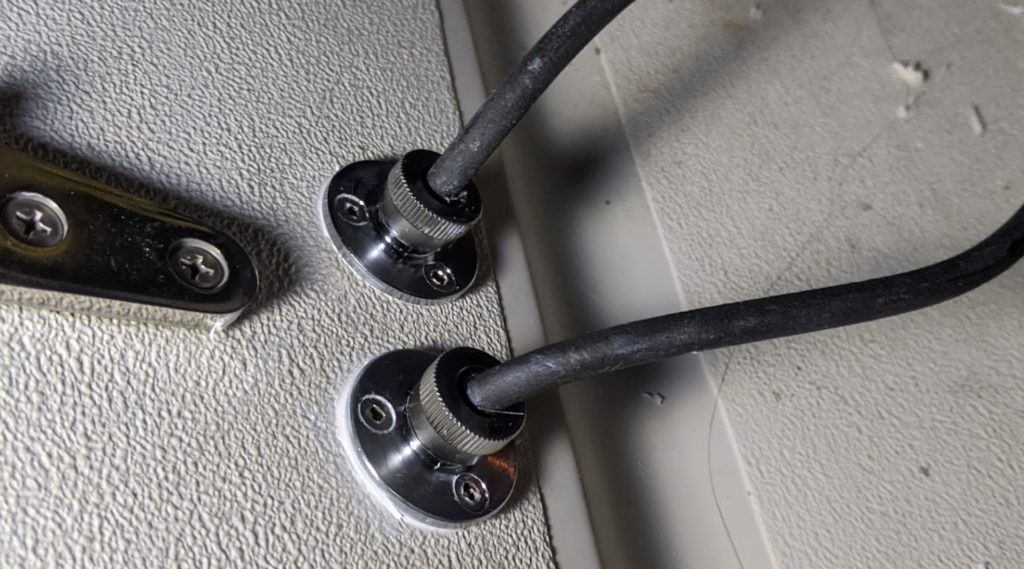
I’m happy with this setup. However, we do need to be careful of the tripping hazard, the wires do run across the deck to the solar frame. It’s not a place we walk or step near so I’m not too concerned.
Within the cockpit locker we needed to figure out where to run the wires.
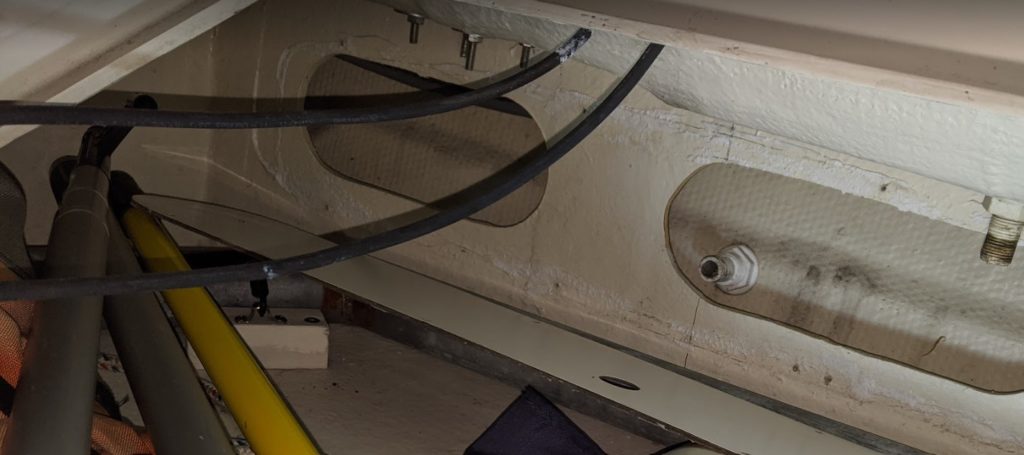
I removed the panel and fed the wires into this cavity. These wires eventually end up in the aft cabin and to the Victron solar charge controller hiding near the batteries.
Of course I quickly hooked things up and checked out the rush of power going to our batteries.
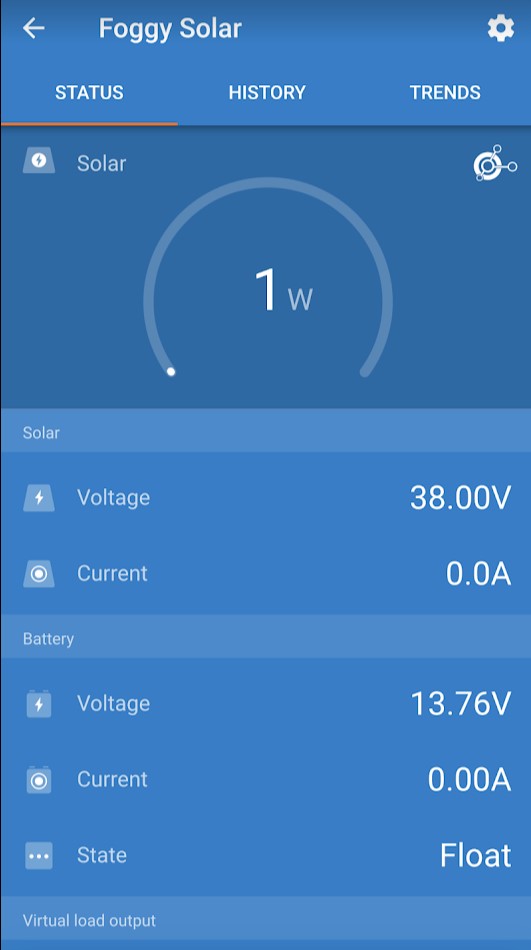
Yes, that’s right. 1 watt! I was devastated. Until I realized my mistake. The batteries are at max voltage, it’s in float charge state. I started turning on everything on the boat. And then I could see the power jumping up. Lori, of course, was also excited to hear how it was going and texts me at the exact same time.
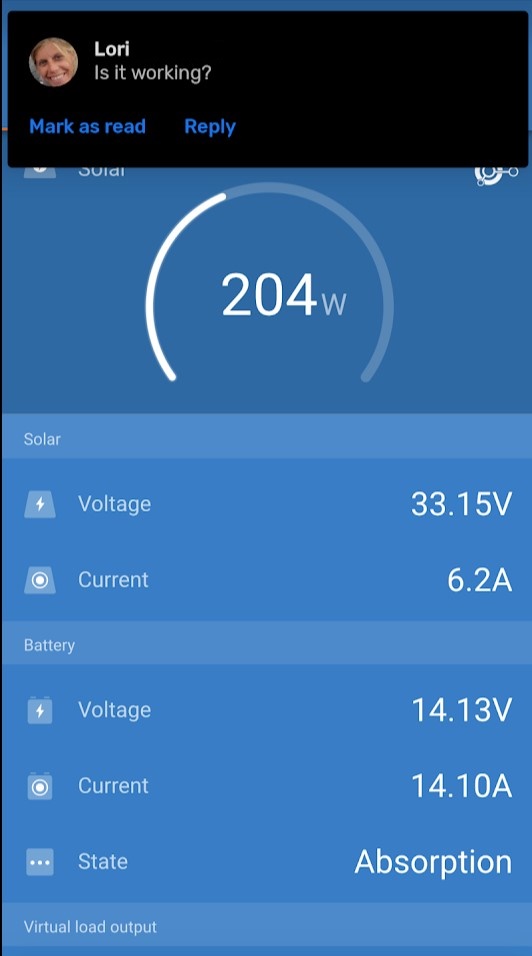
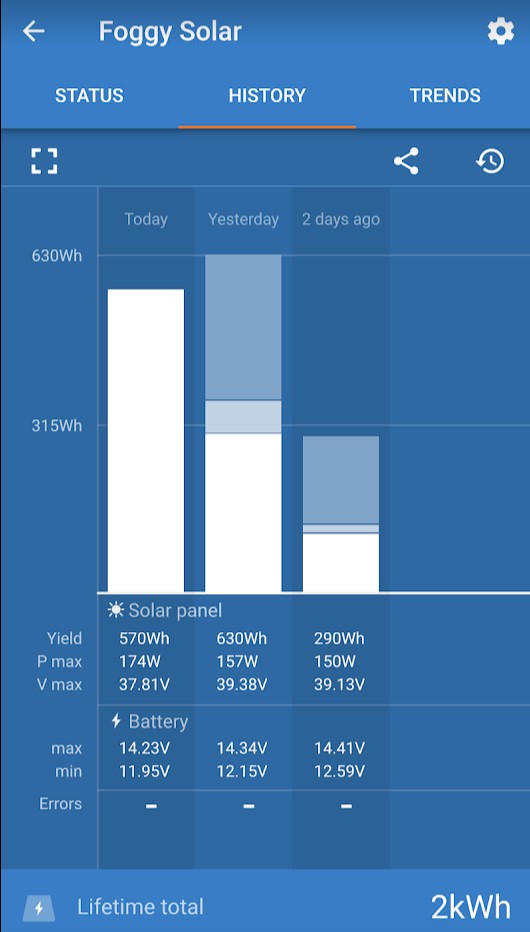
Success! Still wasn’t seeing the max output of our panels, they are 330W each. But we started to see it over time.
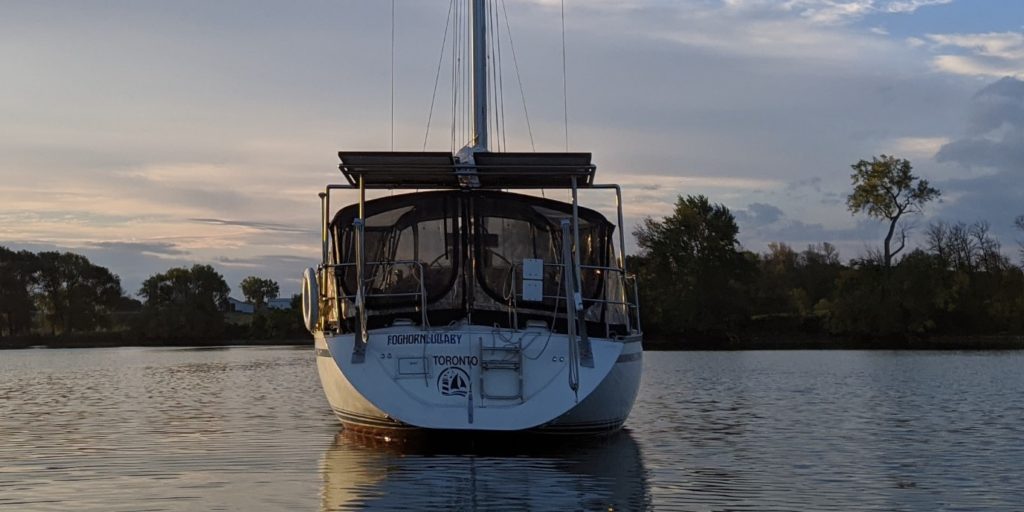
Here are some pictures of the final result.
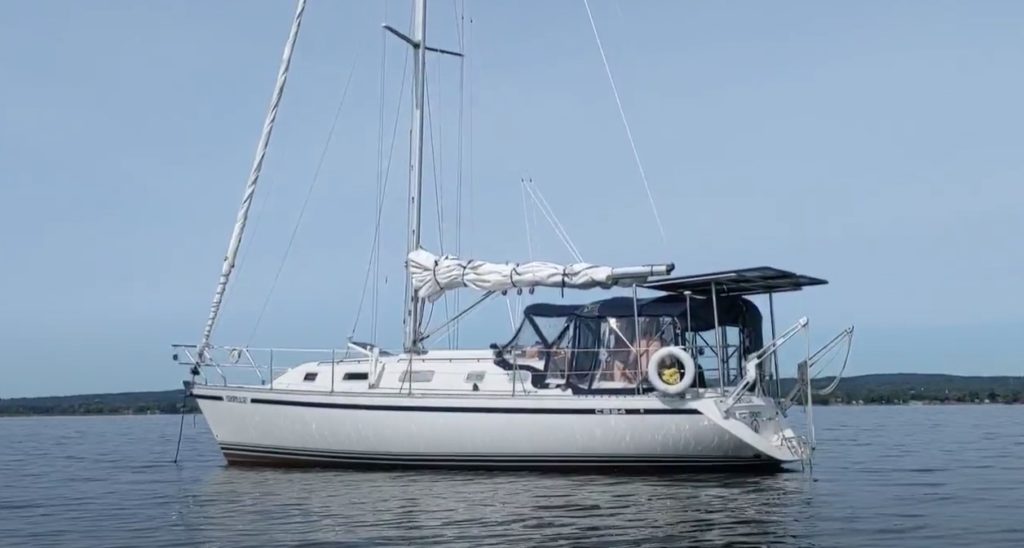
We didn’t have much of the season to enjoy the solar. But for those trips we did go on, it was amazing. No concerns about the fridge/freezer running all the time. During the day we plugged in our portable electronics for recharging. While sailing we ran all the nav gear, VHF, autohelm. At night we left lights on, used the water pumps, all without any care or worry.
The next morning I would check the batteries and see they had gone down about 20% overnight. And then I would see the sun come up and quickly re-charge the batteries back to 100%. Which was amazing but wrecked my plans. I was planning to upgrade our Canadian Tire house batteries to lithium.

But now I had to accept the fact that lithium wouldn’t change our life at all. We don’t need them. I’m still a bit disappointed saying this.
Maybe in the future we will be more power hungry with an inverter running electronics and maybe a toaster or a microwave. Until then, we really don’t need a lot of battery.
Lessons Learned
- Measuring and sizing things on a boat are hard. There are no straight edges, anywhere. There is no “level”. And things are not even. Spacing and screw holes on port didn’t match exactly on starboard.
- Things on paper vs in real life can look much different.
- Keep an eye on the experts, they know what they are doing but they may not know what’s important on a sailboat. One design option was to put a single vertical bar above sugar scoop. This would have blocked our access to the dinghy.
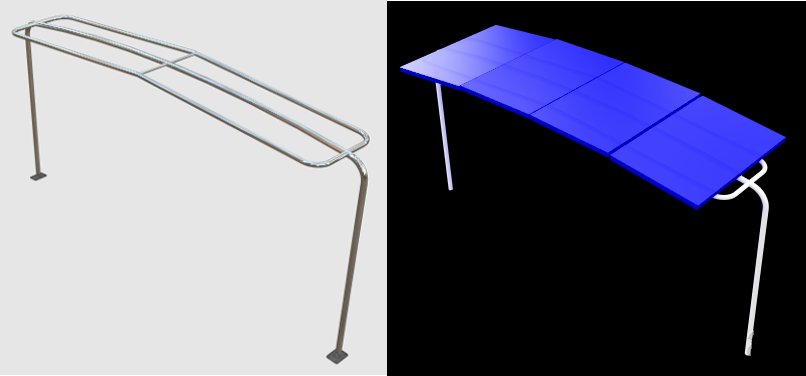
Next time, I would summarize all of this into the following advice. Create a model of your design before you weld it! If I had to do this again I would use an easy to cut material to model the design. Maybe PVC pipes or maybe just pieces of 1×1 boards. This would allow you to test stiffness and design aesthetics and make quicker mods before the final frame is built.
If I had done this, I would have probably ended up with a much more expensive, but simpler setup on the back of our boat. Replacing the existing pushpit with an all inclusive pushpit, solar arch and dingy davit system.
Previous posts on our solar install
- Solar Update – Victron BMV-712 – we install a battery monitoring system.
- Solar for our sailboat – the first batch of solar equipment arrives!
- Planning our sailboat solar system – where it all started, it was so long ago! Interesting to go back and re-read this. There was so much to learn at the beginning.
Going back to the beginning I think the process should be:
- Get a rough estimate of your power requirements. The battery monitoring system really helped us with this. High power consumers include the fridge, autopilot, water pumps and non-led lights. Even more power hungry devices include: air conditioning and inverters driving a microwave, electric kettle, …
- Decide on what panels you want, and can get. My preference is solid panels instead of flexible. There are some that claim you can mount on your deck and can walk on them but I don’t think they are that reliable and you still need to deal with the wiring across the deck.
- Figure out where and how you are going to mount the panels. You want a safe place that is also free from any shadows. Even a line or a shroud casting a shadow across a solar panel can have a surprisingly large effect.
- Install and have a qualified marine electrician review your plan and final solar installation.


February 13, 2021 at 9:29 am
Wow you are ready to go with 660W! Your set up looks great! I feel the pain of the frequent trips to fit and make the adjustments. I made our dodger on our last boat and it nearly put me over the edge with all the adjustments. Boats are not symmetrical!
This post was perfect timing as we just received our panels. We opted for SunPower flexible panels purely for the convenience of an easy install so we can take advantage of some passive energy and free up time for the fun stuff. We’ll see how it goes, we got a great deal from the Virtual Toronto Boat Show.
Wondering where you mounted the controller? Under the berth where the batteries are? We don’t have much space under there so was considering inside the closet?
February 13, 2021 at 1:20 pm
Great purchase, we have friends that bought the same ones from the boat show and are really happy with them. And it is the best deal at the boat show.
Our solar charge controller is hiding in the little storage box under the cushion below the closet in the aft cabin.
Congrats on having the expertise and patience to make your dodger. Impressive!
February 13, 2021 at 7:08 pm
Thanks! That little storage area is a better idea than the closet.
Hope u guys are fairing as best u can in lock down….hoping it’s over soon.