Our holding tank was filling up with air and looked like it was about to explode. After weeks of troubleshooting and learning about a marine head system we figured it out and have it fixed!
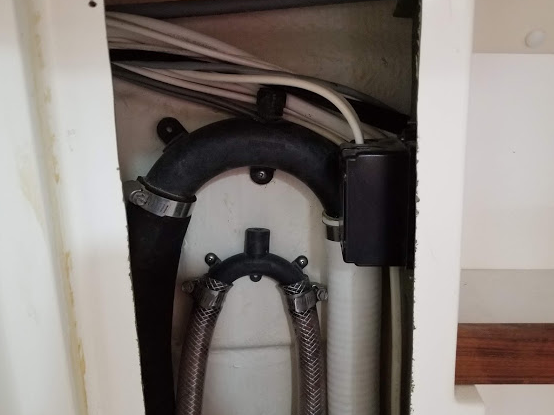
During our trip, at Leek Island, we noticed the pump on the head was getting harder and harder to pump but the reading on the tank was showing that it was only half full. We had to abandon our plans to anchor out and start using marinas to gain access to a working toilet. When we started to investigate, this is what we found under the bed in the rear cabin.

The holding tank was full of air and pushing up, I’m surprised nothing popped. Wouldn’t have been a great experience for the kids sleeping on top of this.
I’m still learning how all these things are connected so I started with the source.

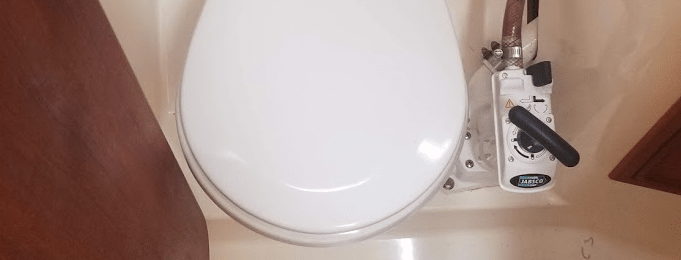
A Jabsco head / toilet. The previous owner said that they recently replaced the pump so I started tracing the system. Before this boat, I didn’t even know how to operate these things. Now it seems so simple, but my first attempt to use this, without any guidance, was a failure. A few important points I learned through trial and error.
- The switch at the back, when turned to the left, brings in lake water to help rinse the bowl. Forget to turn that switch back to the right and you will return to an overflowing bowl.
- The handle locks by pushing it down in the unlocked position and then twisting to locked. Many times I just twisted to lock without pushing it down hard enough first. You can tell it’s locked when you can’t raise the handle.
- Smooth slow pumps. Enough said.
Starting with the pipes on the toilet, the one at the top takes lake water and pushes it to the back of the toilet. I then started to follow the pipes to the compartment under the sink.
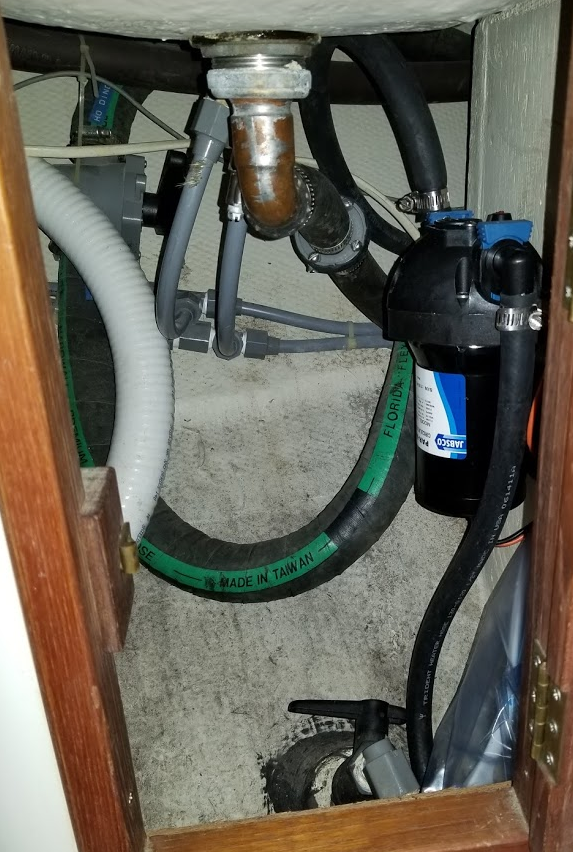
At the bottom right there is a seacock that allows lake water to enter for adding water to the toilet bowl. I later discovered the diverter valve up higher.

This allows you to change where the “flow” goes. It has three positions. Up, as seen in picture above. I think it should say “HOLDING” not “HO DINO”. This sends flow to the tank. Middle, toward camera. This blocks all flow. And Down, this sends flow to the seacock for releasing to the wild. Which, I know, is not allowed almost everywhere.
Note: The position of the diverter valve is confusing. I originally thought the long part of the handle points to where you want it to go. This is incorrect. In the photo above, the valve is completely shut off. It needed to be rotated 180 degrees to send to the holding tank.
Tracing the pipes back to the small closet by the shower I found the following. And yes, it’s dirty, we haven’t gotten to cleaning this up yet.
The seacock on the right is for directly releasing the contents of the toilet into the water. This was, and will always remain off. I would like to remove this, I’m not planning to take the boat into salt water and as it’s just one more hole in the boat that could fail. The seacock on the left is for the sink drain.
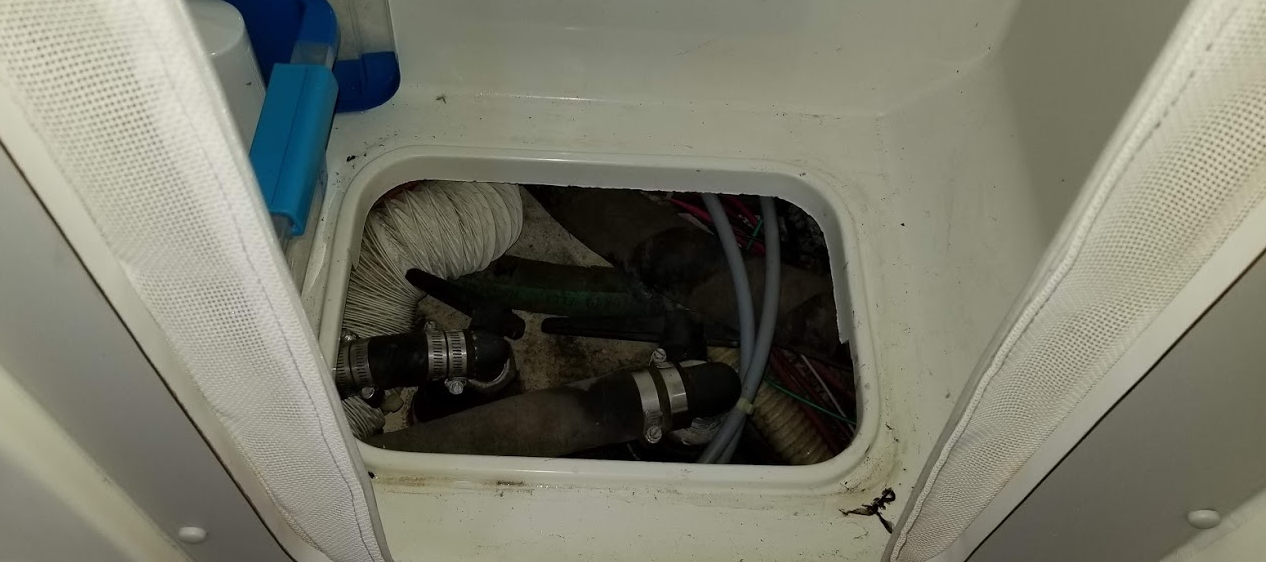
I struggled to find where things connected into the waste tank. I went through the entire rear cabin, engine compartment, looked in the starboard cockpit, dug under the bathroom, tried crawling around into the cavity at the stern. Then I finally noticed what was in front of my face. In the starboard cockpit locker there’s a small cover. Opening this up revealed.

I crawled down and used the camera on my phone to look into the tight spots and I found what I was looking for. Low on the forward part of the tank I saw the waste entrance.

As I searched with my phone I found at the rear (towards stern) part of the tank and up at the top the vent line. It’s the thick black pipe with the two pipe clamps.
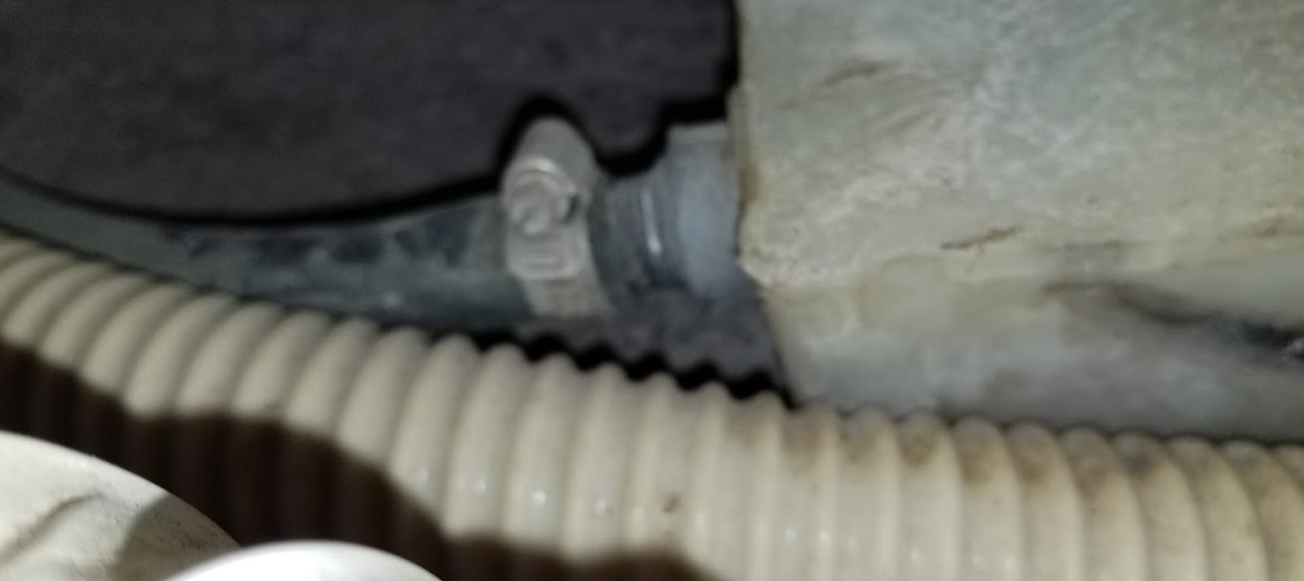
Continuing to trace this vent line back I found it led to the chrome vents that can be seen on the stern of the boat. It’s the black pipe with the single pipe clamp. The waste tank goes to the inside vent on the starboard side and looks like this from inside the boat.

The one on the right is the holding tank, the one on the left is the diesel tank. The brown on the left isn’t anything nasty. It’s additional fiberglass and aluminum plates the previous owner added to give some additional strength to the davits on the back of the boat.
Finding a solution
OK, now I knew how all the pipes connected but still not sure why the tank was bloated and the toilet plunger wasn’t working. So I turned to a fantastic resource, CS Owners Association. They have a user forum running as an older style Listserv through Yahoo Groups. The system is a bit dated but the people following this group are amazing. I posted a message explaining the situation and received a bunch of great advice. We narrowed it down to two possible problems to investigate, in order.
- Clean the air vent – it’s common for these to get plugged and a bloated tank is a common symptom.
- Check the joker valve in the toilet
Fixing the toilet
I didn’t take any pictures during this process, it’s a disgusting smelly job and you become numb to the smells and grossness that you are dealing with. But still, rubber gloves, eye protection and a breathing mast is strongly suggested. Also cover any open cuts/sores. I also had ample cleaning supplies ready to clean up any spill immediately.
Cleaning the air vent, started with the connection on the tank. I used a refillable ketchup container with a sharp cone tip to spray things down. And used a tin foil tin to catch the crud. It worked really well since I could mold it into the spot needed to catch the grossness. After removing the connection I sprayed some water directly into the tank to make sure nothing was caught there.
I then moved the the vent on the stern. After removing the pipe clamp and rubber pipe you need to use a wrench to undo the bolt about a 1/4″ and then on the outside you can slide the chrome vent piece up and off the pipe. I immediately dumped all this into a container with some cleaner. I could see right away this was the problem there was a waxy soapy gross goo filling the entire vent. It makes me feel better saying that than what it probably really was, OK, I’ll say it. It was probably poop. An old toothbrush and some rags cleaned up the vent and I reinstalled the vent onto the stern.
I then used the ketchup bottle again to inject water into the vent pipe and some grossness also came out and I was pretty certain the hose was clear now.
After cleaning up, I tried the toilet and it was still the same. The pump would move but it would resist and nothing would flow out of the toilet. So I checked the Joker valve.
I started with closing the valves, first the fresh water seacock and then I set the diverter valve to the middle position. The holding tank was pumped out, but there was still some stuff sloshing around. I didn’t want it to all pour out.
Removing two screws from the base of the toilet pump revealed the spot where the joker valve is hiding. This also released some grossness so be ready for 1-4 cups of liquid. I then slid out the joker valve and immediately saw there was something wrong with it. All the advice online says that if you hold it up to the light you should see at the most a pinpoint of light.

I saw three holes the size of marbles. Later I figured out that the joker valve had inverted. I guess all the frustrated and desperate plunging caused it to invert. Resulting in it doing the opposite of what is supposed to do. I inserted a new joker valve and put it all back together and gave it a quick try and … it worked!
Time to pull out and replace joker valve 2-3 minutes. It was surprisingly easy to get to and replace. But time to prepare the area and then clean up afterwards… 1-2 hours.
Update – August 2018
Looks like we were not finished with our system. The pump still didn’t feel right, there was resistance and still air being pushed into the holding tank. After some more investigation we found more hidden pipes behind the mirror in the bathroom.
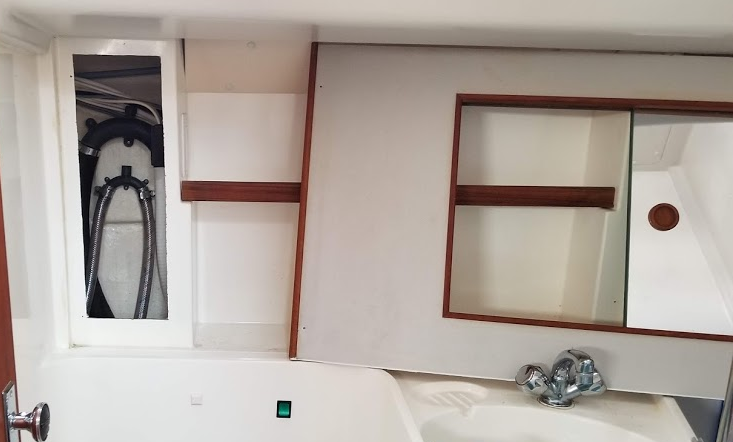
These are the anti siphon vented loops that go above the waterline and include one way air vents.
That black box on right is another hidden power outlet we found in the bathroom as well, had no idea there was an electrical outlet in the cupboard. Always finding new things.
We unscrewed both black plastic “U” bends and disconnected them. The smaller pipe is for lake water intake going into the toilet. The larger pipe goes from toilet to holding tank. We then took both vents apart and cleaned them. Just make sure you put the rubber valve back in the same way you found them.
I was a bit confused and we debated on this for a while. Our vents were setup to allow air out, not in. This seems backwards to me. Since I would have thought you wanted these to drain and fill full of air when not in use. The instructions we found online were not clear.

Some further research revealed that ours were incorrect.
BoatUS Magazine has a great article explaining all the details and importance of these valves, Anti Siphon Valves. Key point is that the rubber duck bill valve needs to be pointing downward to allow air in, not out.

After all of these discoveries, I made the following rough diagram of our system.

Note that there is a second seacock by the water heater. It’s for the drain in the bathroom sink, I didn’t include it in the diagram above.
Instructions for removing bathroom mirror
Warning: Taking the mirror off is a huge pain! And we did a little bit of trial and error. At first I tried taking the faucet off. It’s typical for faucets, a really large bolt around the pipes is compressing the faucet onto the sink. We took it off and then found that we still couldn’t pull out the mirror. You need to take the shower glass off so it can slide to the right.
- At top of vertical steel rod holding the shower glass there is a single screw that prevents the rod from rotating. Take this out.
- Remove the two bolts holding the shower glass to the steel rod.
- Using a wide screwdriver or a small crowbar, carefully pry up glass from bottom. Careful, looks like previous owners cracked some of the window trying to do this. At same time, twist vertical rod to allow window to pop out toward stern of the boat.
- Loosen the bolt underneath the faucet. You don’t need to take the faucet out, you just need to be able to twist it 1/4 turn clockwise to get it it out of the way of the mirror.
- Undo screws on mirror, pop out towards you. May be some silicon at bottom holding it in.
- Slide mirror to the right.


November 3, 2018 at 5:41 pm
Thanks for the info, this was really helpful when we were trying to figure out our system!
November 3, 2020 at 7:42 pm
Thank you for the detailed instructions about how to take out the mirror. I’ve been trying to figure that out.
November 3, 2020 at 8:49 pm
Glad you found this info useful. Let me know if there’s anything else I should share or if you have some other tips/tricks for dealing with this.
BTW – funny that Nov 3 is a popular day for commenting on this blog!
July 3, 2024 at 11:19 am
I found this extremely useful as we started using our new to us CS34 Enchante (formerly “Legacy”)
On May 27, 2024, we found that the head did not want to send waste to the holding tank. Instead, the waste was putting pressure on the joker valve and letting liquids flow the wrong way. It seems the holding tank was not empty when she was removed from the water, so we encountered: clogged vent line, and too much stuff in the tank that became very evident at first pumpout (a geyser-like spray). The tank did not bulge but it may have wanted to. Anyway, the details you provided saved me hours of trail and error, as I read this article before using the head.